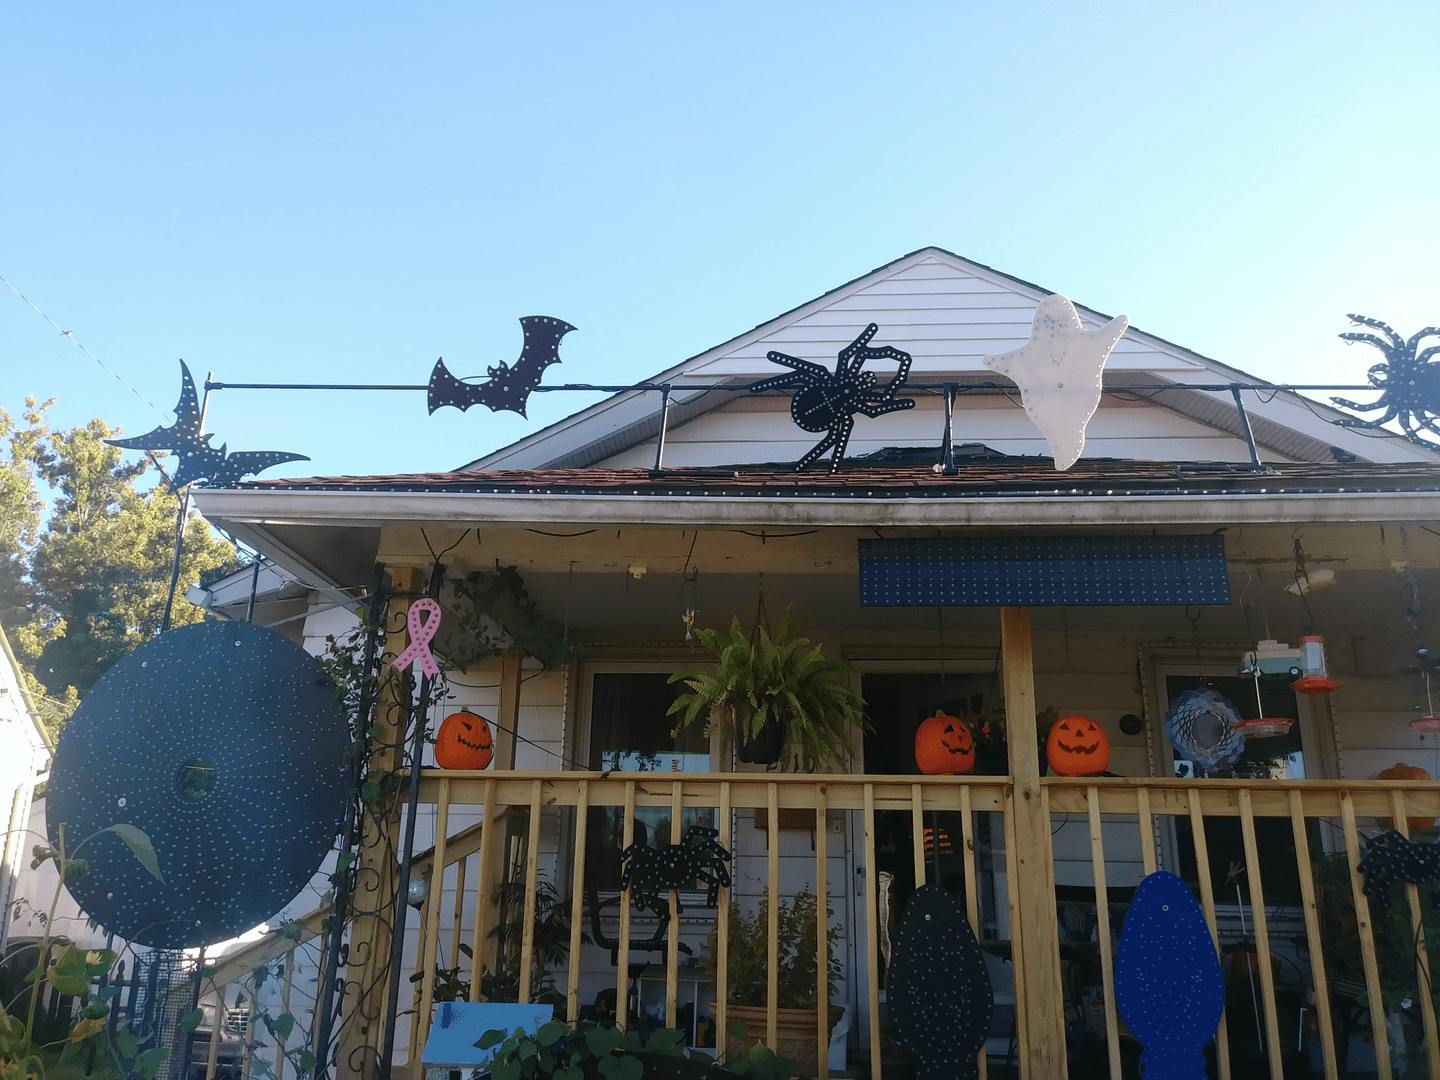
This is my first project using MakerPipe. It's part of my Halloween Light Show (and will be part of the Winter show as well.)
I use MakerPipe to join the 1/2" conduit that goes across, to a pole on each side.
I then use MakerPipe to connect 1/2" PVC pieces with a tee-connector to support it in the middle.
There's currently a double support in the middle (going forwards and backwards to make an A frame,) and a piece on either side of that. (One of those pieces is secured to the roof by a bolt from a previous satellite dish frame holder.)
Most of these connections are made with T-connectors. There's a 45 degree connector going from the pole on the right backwards to the ground.
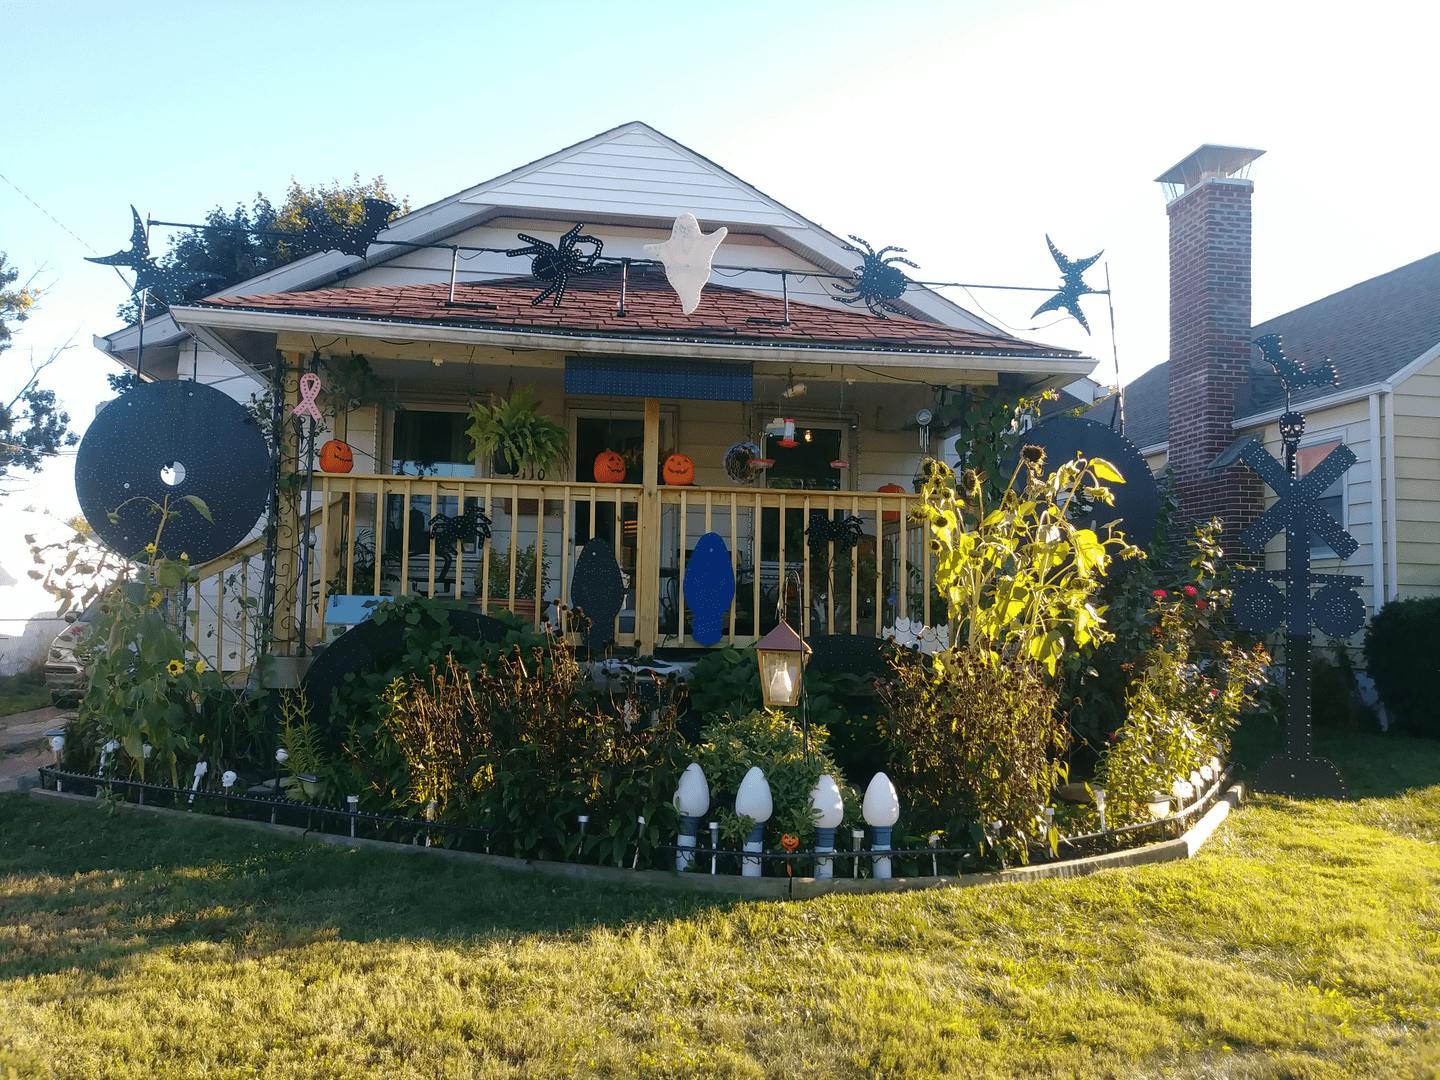
On the right of the "wide" picture is the RR crossbucks prop. (All the props are made from 10mm coroplast.) It's holding on to a 1/2 conduit, which has been in the ground since last September, and wouldn't pull up after the winter show. Because it's not all that stable, it also has a backwards support using a 45 degree connector.
After the show opens tomorrow night, (October 1st,) I try to remember to post a video of the show.
Having the props above the porch roof, and so far, still be stable, has made a big improvement in the show from last year.
It's one thing to see them above the roof line on the computer screen, as I'm working on sequencing the lights to various songs.
It's another to watch it in real life.
If all this survives the wind storm today, and the rest of the fall and winter... I have plans for more next year, too. (I'd love to have some poles that go from this cross pole to poles connected poles on the house roof, then... Hmmm, too many ideas, not enough budget... I am on Social Security, after all.)