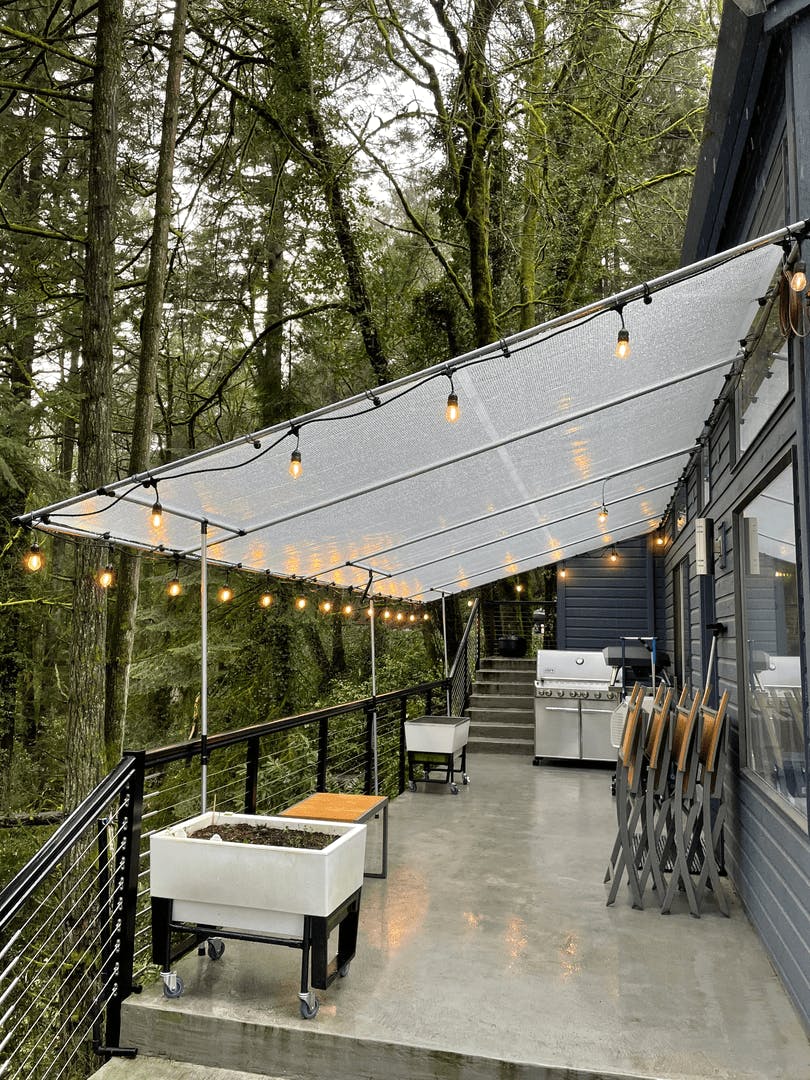
Canopy Rebuild —
You may have seen in the recent Maker Pipe Monday video (https://youtu.be/lgAiF0tDiPA) the description of my new, bolt-secured bimini eyelet bracket. The rumors about the canopy failing due to wind are not quite true. . .
Ok, so the recent snow and ice we had in the Pacific Northwest was the issue, and one that I anticipated. We don’t get a lot of snow in Portland, Oregon, but every other year or so we get some measurable accumulation. Our house is at 900ft elevation, so we get a little more than the rest of the city when it happens. The week before last I was periodically bumping the canopy from underneath to send the accumulated ice pellets down and over the edge, but when I went to bed I was worried. By morning, a good six inches had piled up, but everything was holding!
I started my routine, bumping the snow into the air, down and over the edge. When I got to a heavy section I started pushing up on the canopy from underneath, once, twice, three times—and this resonant bouncing caused a LOT of additional weight, and, well, the upper eave slipped free and the whole thing came down on top of me.
Fortunately, the setup was not that heavy to begin with, and our metal deck furniture, grill and tables gave me plenty of protection once I hit the deck! I was fine and crawled out, but the noise gave my wife quite a scare. Some of the pipes bent from the impact, but in the end, everything was rebuildable. It’s one of the things I love about Maker Pipe—the connectors can be reused, and I only needed to replace one 10-foot EMT pipe.
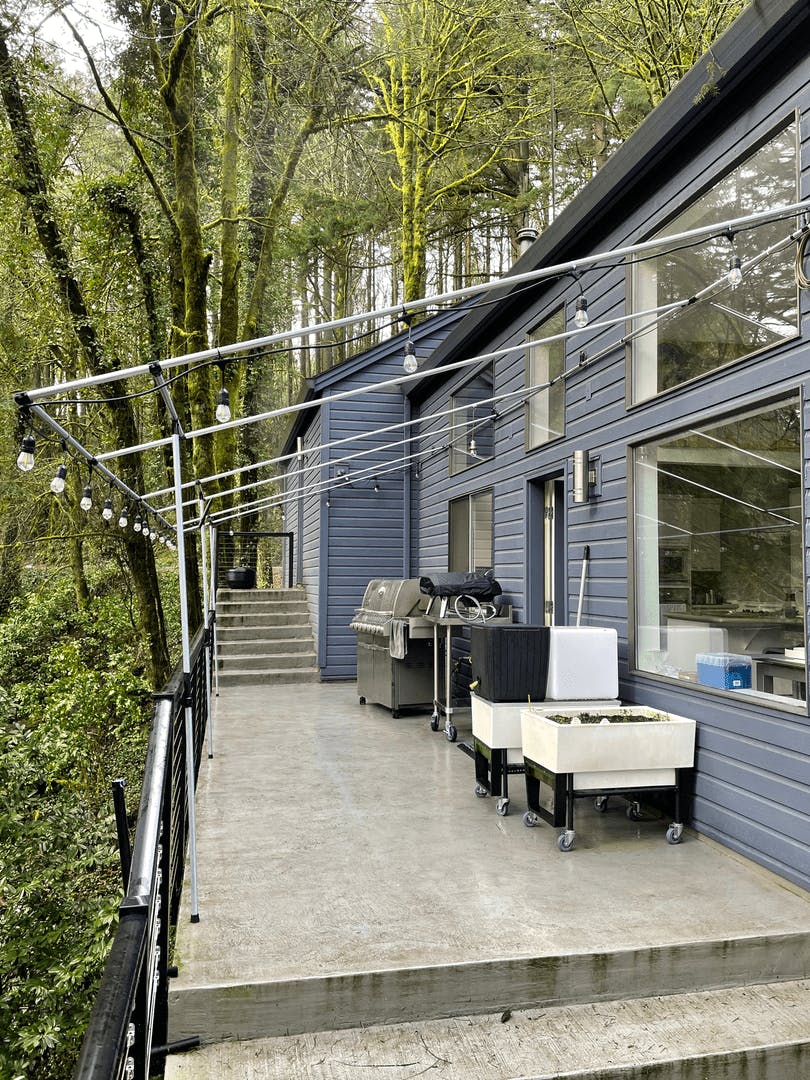
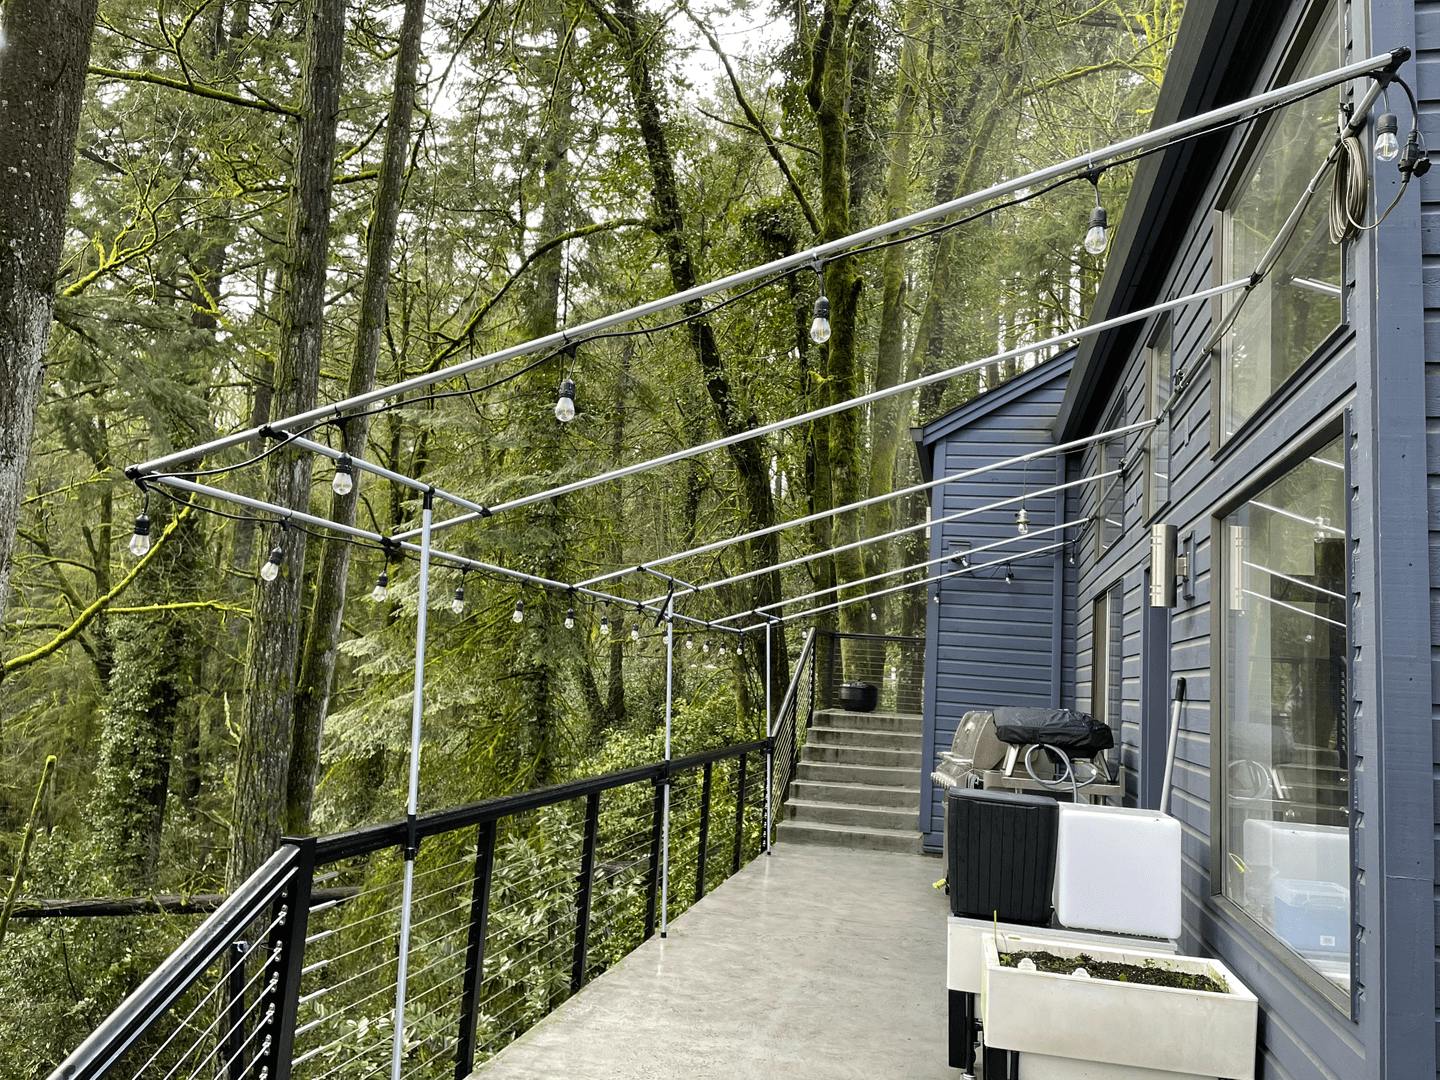
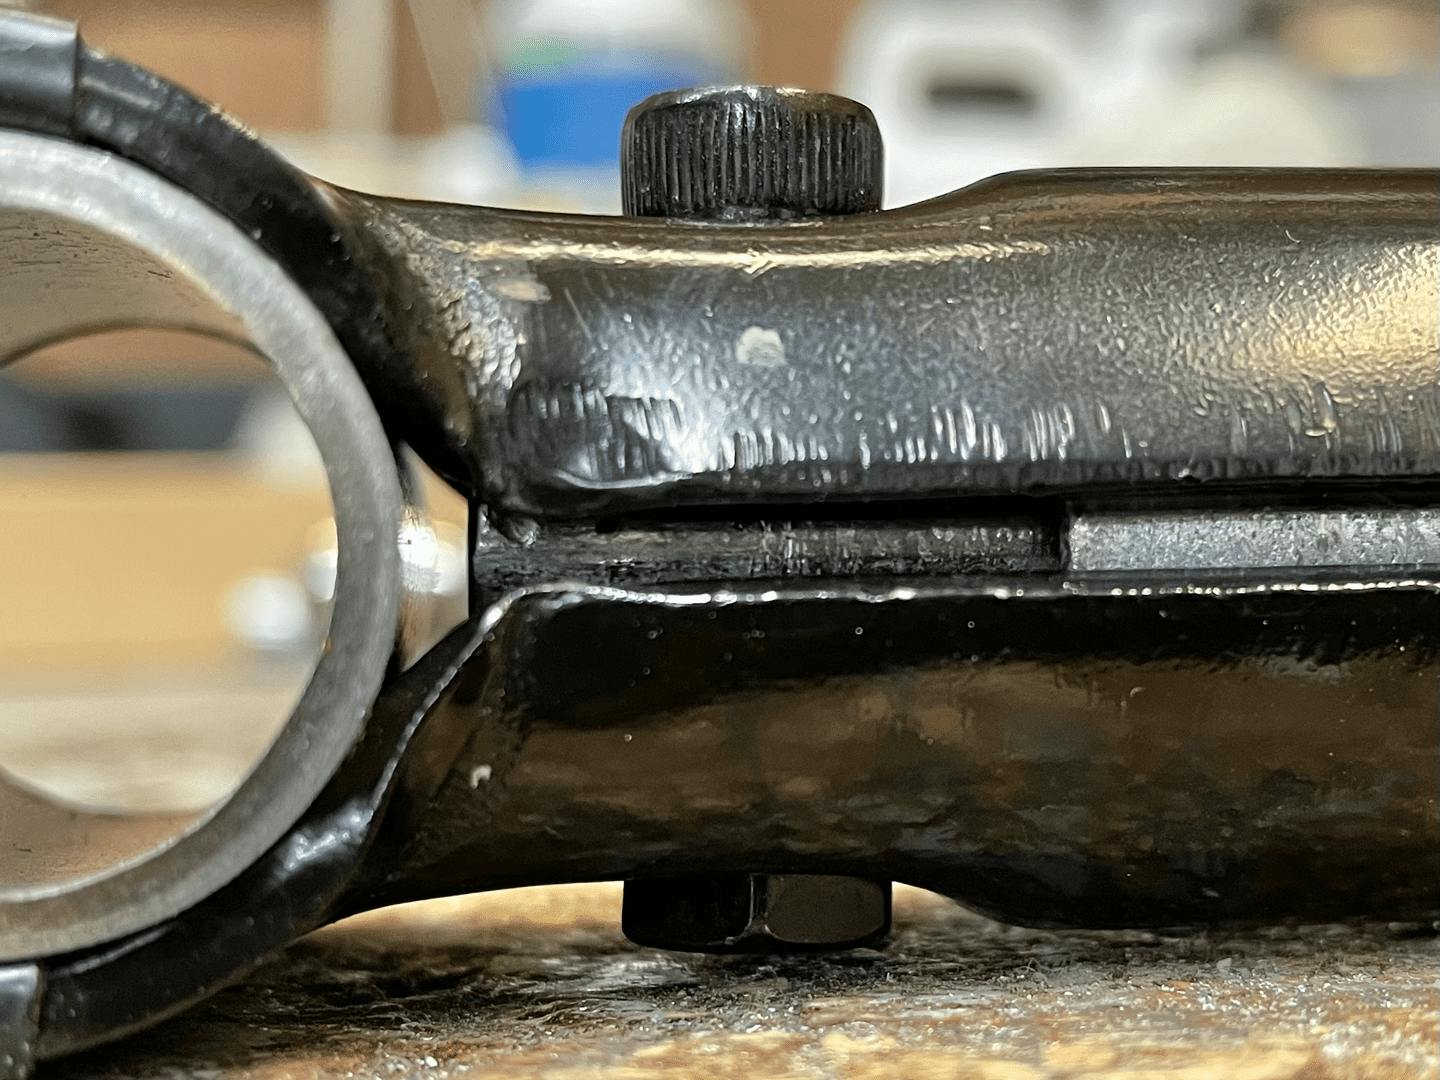
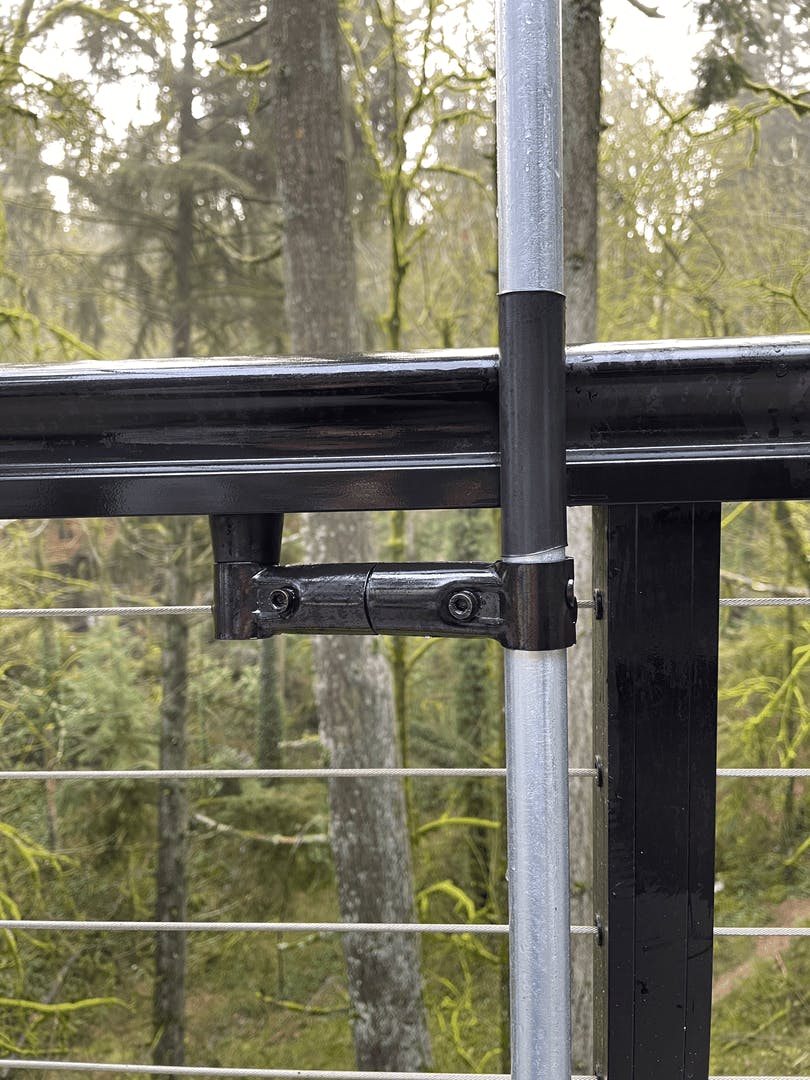
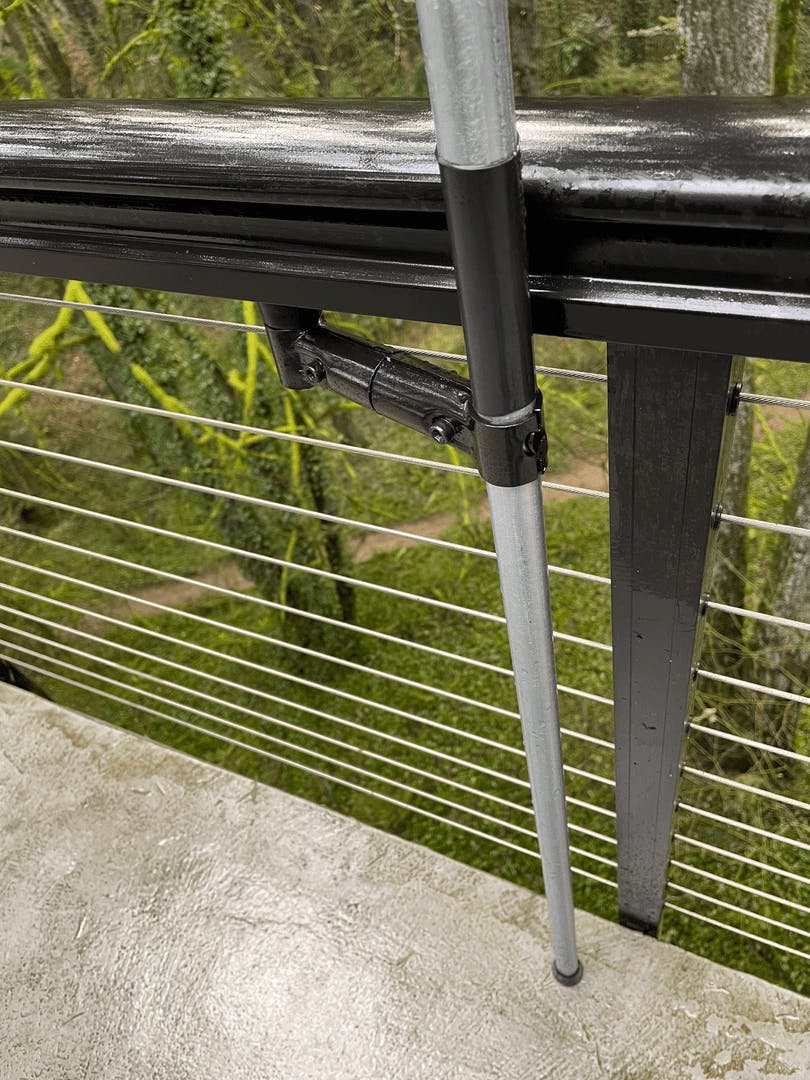
So, here are some pictures, totally rebuilt. The failure happened at the bimini eyelet. The hinge brackets remained attached to the house. The problem was my EMT stub attached to the bimini eyelet part had slipped out of the T connectors holding the upper eve to the house. Using a stub this way with direct tension pulling out of the connector was a poor design choice.
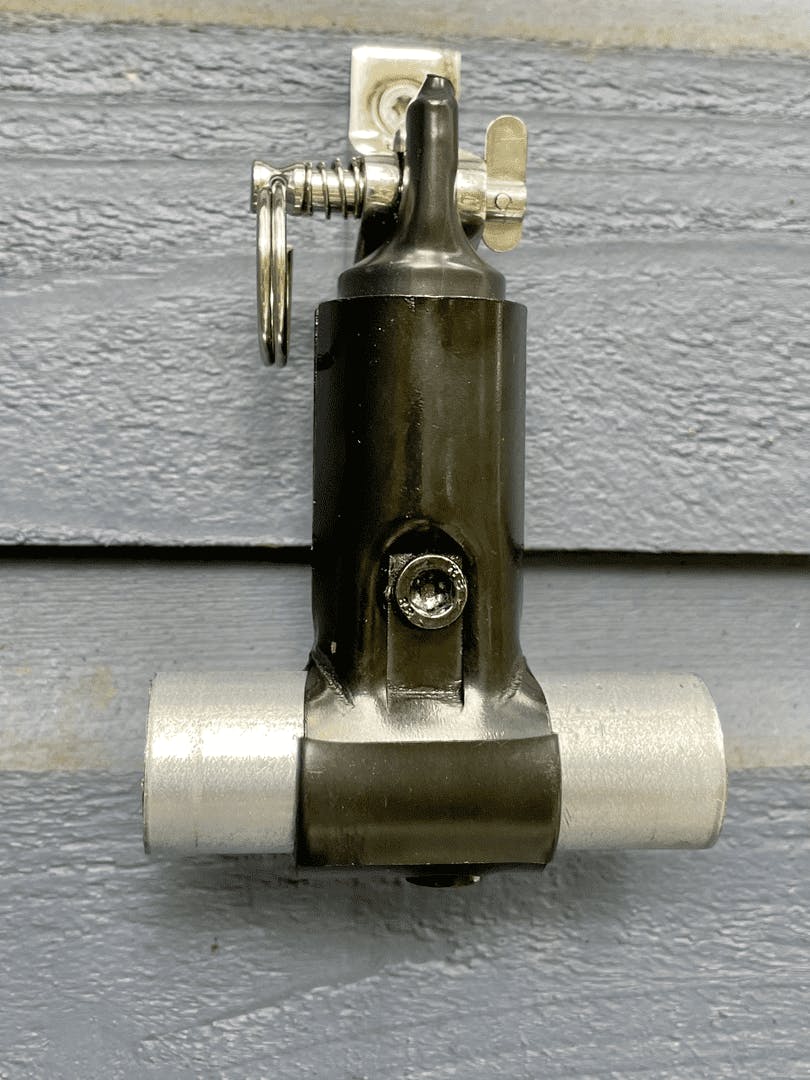
The rebuild now has through-hole bolts using the technique I wrote about earlier (I replaced the bimini eyelet part and now have a stub of 1/2 EMT captured by the Maker Pipe bolt and running up to the bimini hinge bracket). The only way this is coming off the house now is if it rips apart my siding and wall framing behind that, as these brackets are attached to studs using 3.5 inch stainless steel framing screws. There can be no slipping now with everything setup as bolted steel.
I wanted to write this because the overall canopy design was strong to begin with. It only came down because of my own flawed stub solution—and my stupidity bouncing the snow like I did. In retrospect, one of the benefits to my build was supposed to be the ease of setup and removal of the tarp using bungee ball connectors. I could have easily pulled the tarp back beforehand, leaving the deck free to receive the snow. Live and learn. In any case, it is rebuilt now using the better bolted brackets and we are ready for spring rain!