Pizza Peel Stand —
Hey, Maker Pipe Community: Here is a simple build for a stand to hold pizza peels outside next to the pizza oven.
As some of you may have seen, I posted a couple iterations of my deck canopy project. The purpose of this is to host safe/distancing couples dinners outside on the deck during the rainy season. The primary motivation is to enjoy my growing pizza hobby!
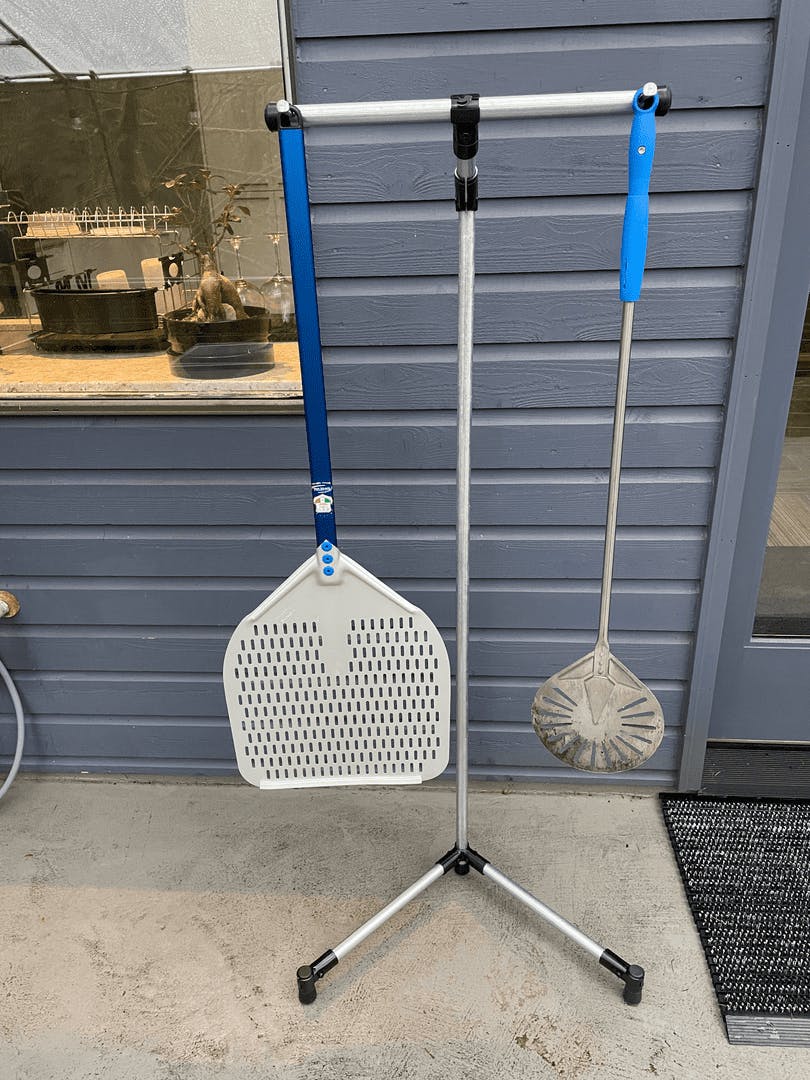
Out on the deck, my pizza oven sits atop a small worktable, but the tools of the pizza trade are peels—long-handled spatulas that are used to launch and turn pizzas in the oven. Peels can be made of wood, aluminum and stainless steel and come in various dimensions. A launch peel is usually big so that it can hold the uncooked dough and deliver it onto the baking stone. Smaller turning peels are usually metal and have a much narrower diameter for rotating the pizza as it cooks, repositioning it and removing it once the crust can hold its own weight.
The problem is, pizza peels are not easy kitchen items to store. There are models with collapsing handles, but the professional tools—even the ones with shorter handles—do not fit in cabinets or drawers. They need to be hung, preferably close to the oven for quick access. That is where the stand comes in. I needed a pair of mobile hooks for easy access near the oven.
Some people hang peels from their work table, or on a nearby wall. For a while, I setup hooks that attached to my canopy, but I wanted something I can reposition during the summer if I move the oven.
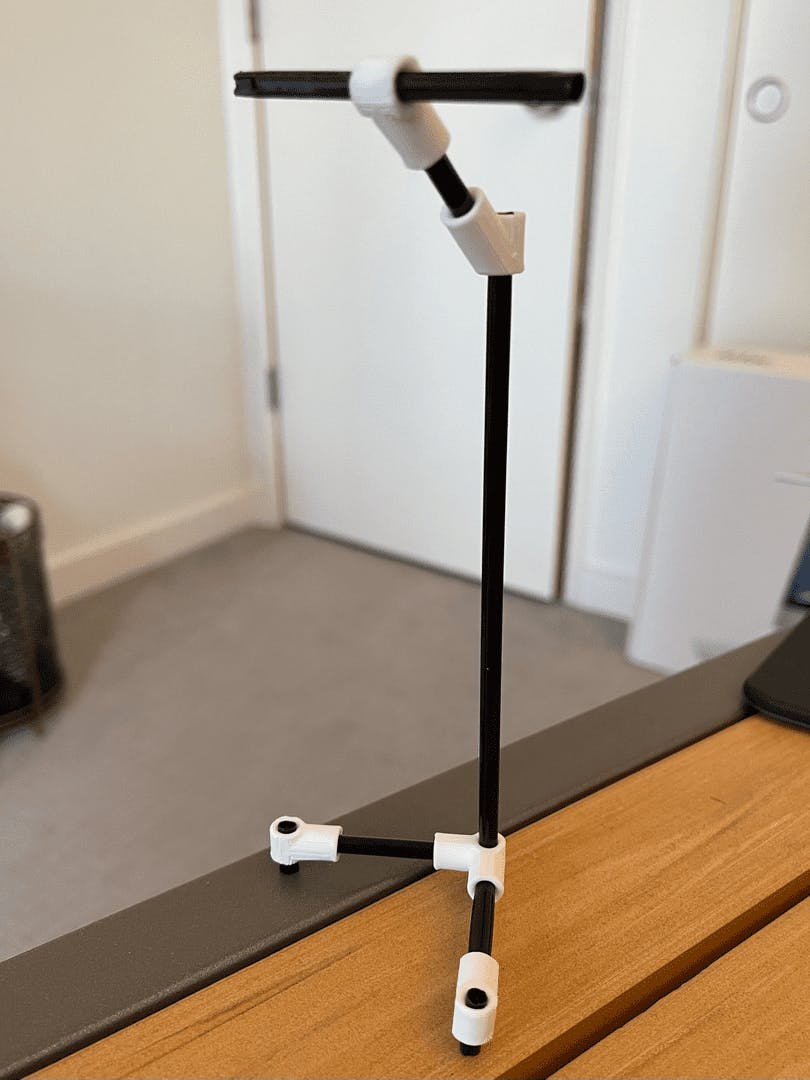
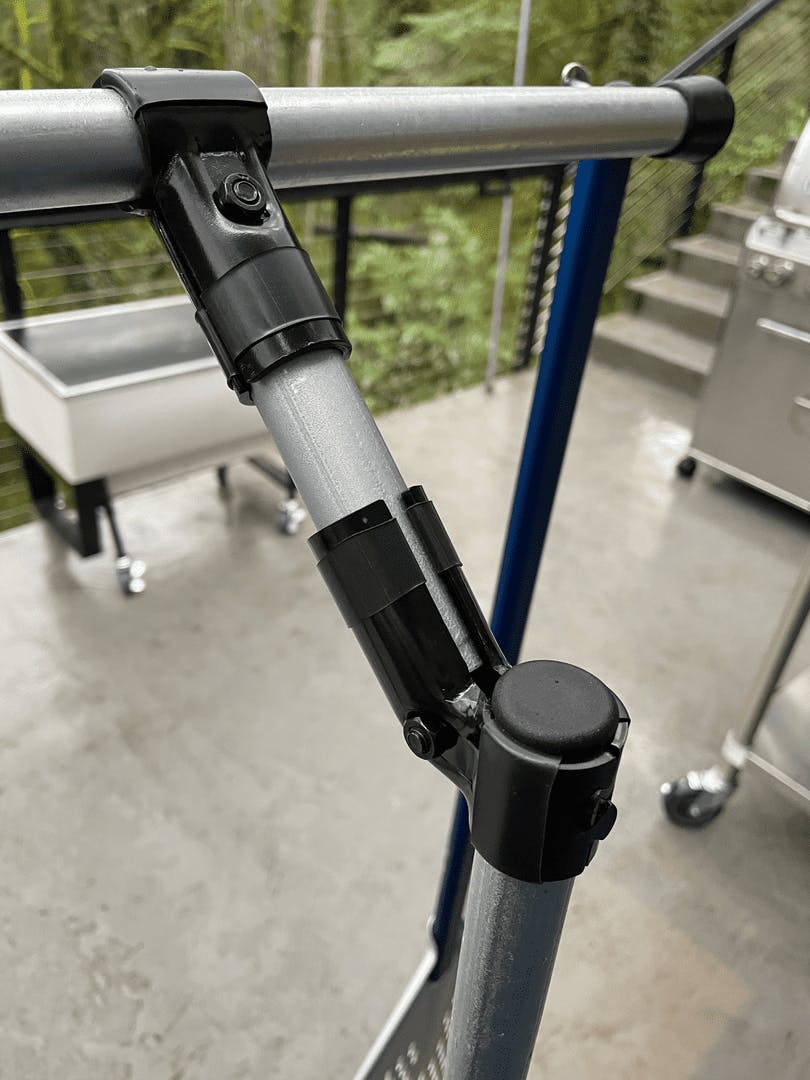
I find the engineering process to be the most fun when I am working within certain constraints. In this case, access to Maker Pipe connectors unlocks a lot of possibilities. Using the Minis, I was able to model a design and see how it looks, check stability etc. before cutting any conduit. Minis make this process very easy to test ideas. For my design, the crucial parts were 3/4 EMT, 3 T-connectors, a 45, a 90, endcap plugs and 7/8” rubber feet. Finally, the hooks themselves came out of my “inventory” of bolts. They are curved-head 1/4” lag bolts.
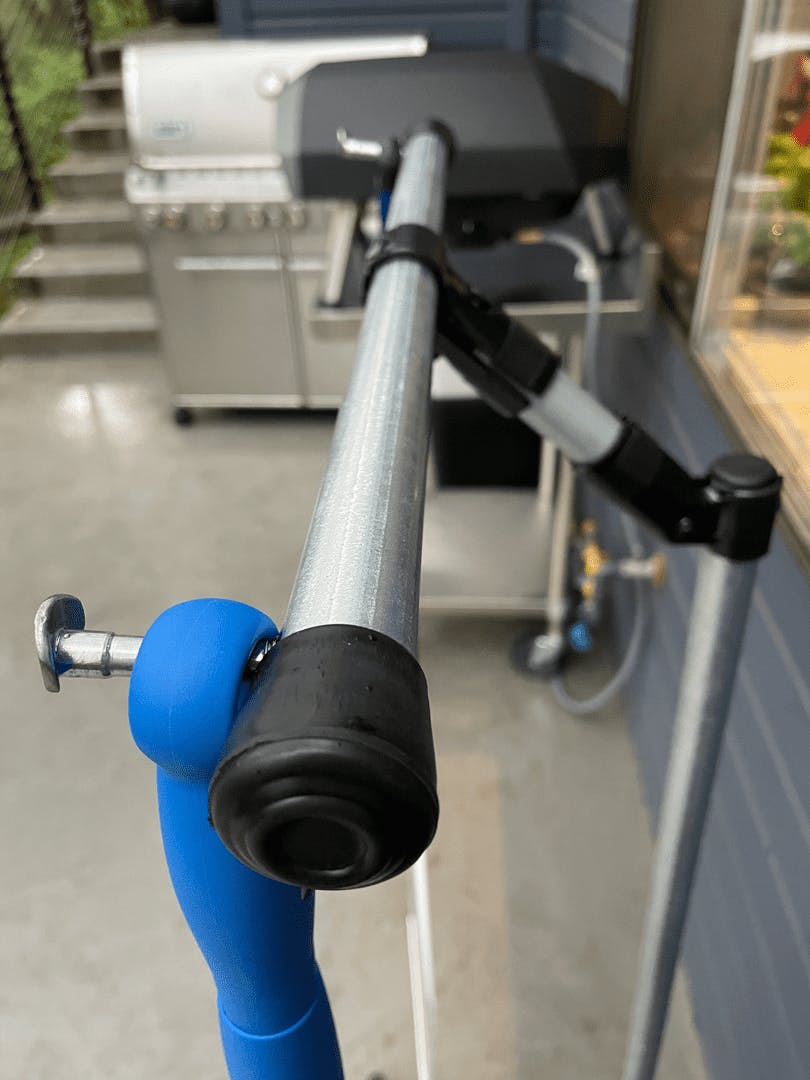
Starting with the hooks, these bolts have curved heads that are designed to sit against the outside wall of a drilled pipe. They immobilize themselves as you attached a nut to the threaded end. Although I am not using them as they are intended, I grabbed them anyway because I had two, they were the perfect length at 2-1/4” and the threads stop, leaving a smooth 1-1/4” of bolt shaft for holding the peels.
I took a piece of EMT and drilled holes through one side of the pipe spaced 16” on center. I then used a 1/4-20 tap to thread these holes. The lag bolts went right in. I tightened them down against the opposite inside wall of the EMT. In order for my peel handles to fit over them, I had to cut off one side of the bold head and file it smooth. This worked great, and they now look like perfect hooks.
The pipe ends are covered with the 7/8” rubber feet. I could have used endcap plugs here, but the rubber is safer at eye-level for some people, and gives a cushion behind the hooks. It also causes the peels to turn in slightly for a neat look.
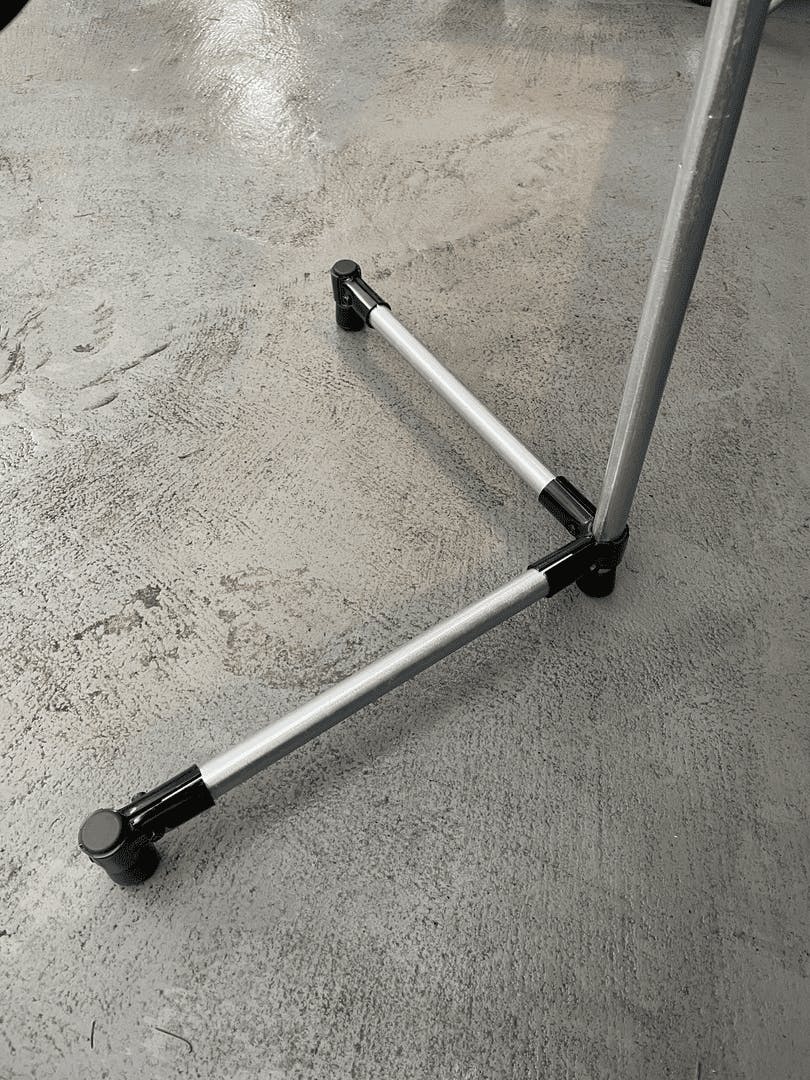
I tested this hook bracket for a month as an add-on to the canopy before building the stand. The stand is a tripod made from a vertical post EMT through the 90 and capped with a rubber foot, then two legs spreading out from the 90. These legs are terminated with T connectors holding capped stubs at 16”. The stubs protrude just enough for rubber feet. I can adjust the balance of the post by changing how much of it protrudes through the 90, and the post height itself is 53” high at the arm, but this is a personal choice that worked for my oven height.
The hook bracket is attached using a short arm 4-1/2” pipe and a 45 degree connector with a T. I added friction bands to the connectors here to stop lever action from twisting the hook bracket out of alignment.
That’s it! I now have a moveable stand for the peels I use to cook pizza. You could definitely adapt other connectors to this design. For example, the tripod base could be done with all T connectors adjusting the stubs for height differences. You could also use a T instead of 45 at the arm. The hooks could be setup differently too, depending on what you have at your disposal.