Pacific Northwest Canopy Over Deck
For the third year in a row now, I setup my deck canopy again to stay dry while enjoying the outdoors (and making pizza) in the upcoming rainy season.
We have had an extended, warm autumn in Portland, Oregon and it has been fantastic, but the season of rain is almost upon us. The canopy I built is essentially the same design for the third year in a row that I originally posted about at the beginning. I rebuilt it here: https://connect.makerpipe.com/post/canopy-rebuild----you-may-have-seen-in-the-recent-maker-pipe-monday-video-h--6035be27a637f84f03517f8b
but the main features have not changed. This year I replaced the 10’x24’ clear poly tarp that forms the roof, but everything else has been reused. That’s one of the huge benefits to using Maker Pipe for a seasonal build project—you can easily take it down, save the connectors and pipes, and next year put it all back together again!
For those of you that are new to the community, you can click my profile and check past posts, but I thought I would post a refresher and describe the main features and requirements of this canopy build in case someone out there is thinking about their own version:
1. Original idea was to facilitate dry, outdoor seating during the pandemic for family visits.
2. Wanted to cover a 8 x 24 foot area with a lean-to style “roof” that attaches to the house and can hold up against strong wind.
3. Uses 3/4 EMT and original, non-adjustable Maker Pipe connectors (just Ts and 180s—no angles no adjustables).
4. Uses an inexpensive, 10 x 24’ tarp attached with ball-bungees)
5. Attaches to house with marine stainless bimini hinges with removable pin for easy take down and re-use.
The biggest insight to my design has to be the geometry—an uncut 10’ EMT pipe used for the eaves/rafters mounted at an angle from the house will overhang our railing by about 20 inches, depending on how high on the house it is mounted and the angle resulting from the leg height. This was serendipitous since EMT comes in 10’ lengths. The height worked such that I can assemble the frame, attach it to the house while leaning it on edge on the deck floor, then swing it up into position with the legs as it just misses the top rail.
One point of evolution was the fact that I found it much stronger to use a drilled and flattened section of EMT for the mate to the bimini hinge. This is a stub that is also captured with the Maker Pipe bolt so the top end of the frame cannot slip loose from the house.
Finally, I have a unique, non-marring hold-down mechanism using an “L” shaped double-T attachment on each leg. Rubber feet tuck under the rail and the connectors get tightened with some tension. This effectively holds the legs down onto the deck—wind will not lift the canopy frame at all!
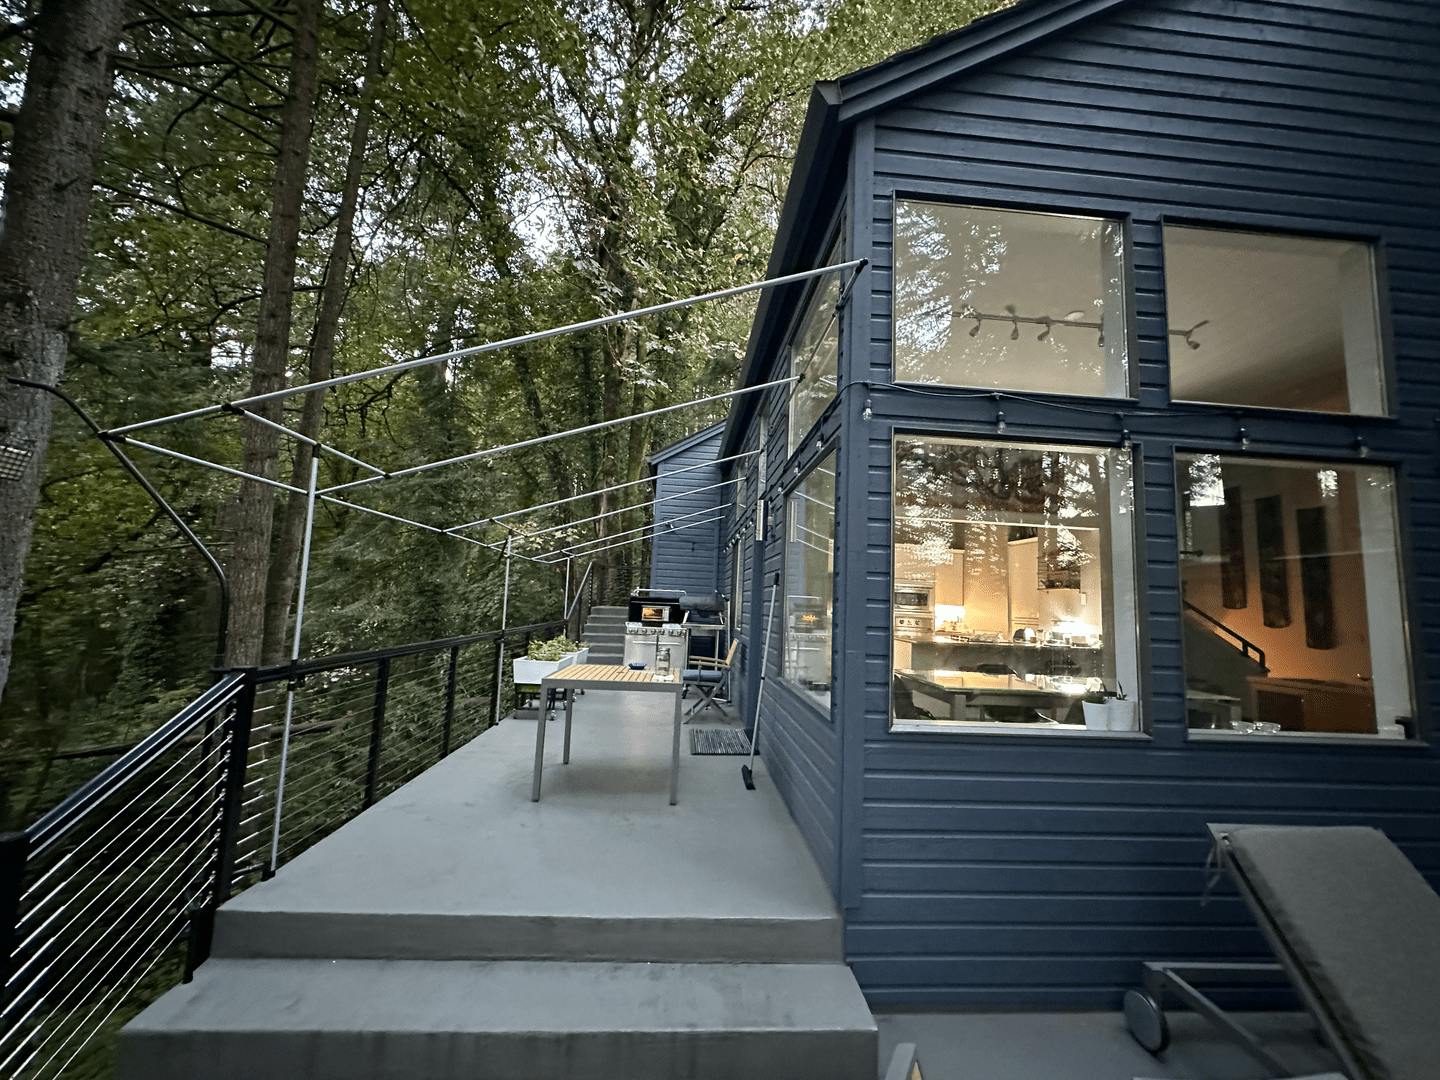
My canopy was a terrific addition to the deck during the raining months. However, this past year I wish I had made a modification due to snow. . .
The original design had sections across its 24 foot length: 4 - 6 - 4 - 6 - 4
Hopefully that makes sense, but basically, there were three 4-foot sections (with the legs at the eaves) and two 6-foot sections spanning between them. Those six foot lengths actually had another 2 feet of the next section on either side before the leg, so that’s 10 feet unsupported.
What I was hoping to do this past season but didn’t get a chance to was to modify the design to be 3 - 4 - 3 - 4 - 3 - 4 - 3. The concept would have been identical, but the legs would come down from 3-foot sections resulting in one more leg, and reducing the open spans to 7 feet vs. 10. You see, those wide 6-foot sections could really sag if the canopy saw snow accumulation. Over the years, I have learned that it is best to simply pull the bungees and pull back the canopy if heavy snow is expected. In one case, that’s what we had to do this past winter. We are about 1000’ elevation, and while we don’t get that much snowfall over winter in Portland, we have had some these past few years and it had me carefully trying to clear it by tapping the canopy from below.
Having narrower, stronger sections would have given me more peace of mind during the lighter snow days between melts.