Another Go-Kart... but with a bit of a twist.
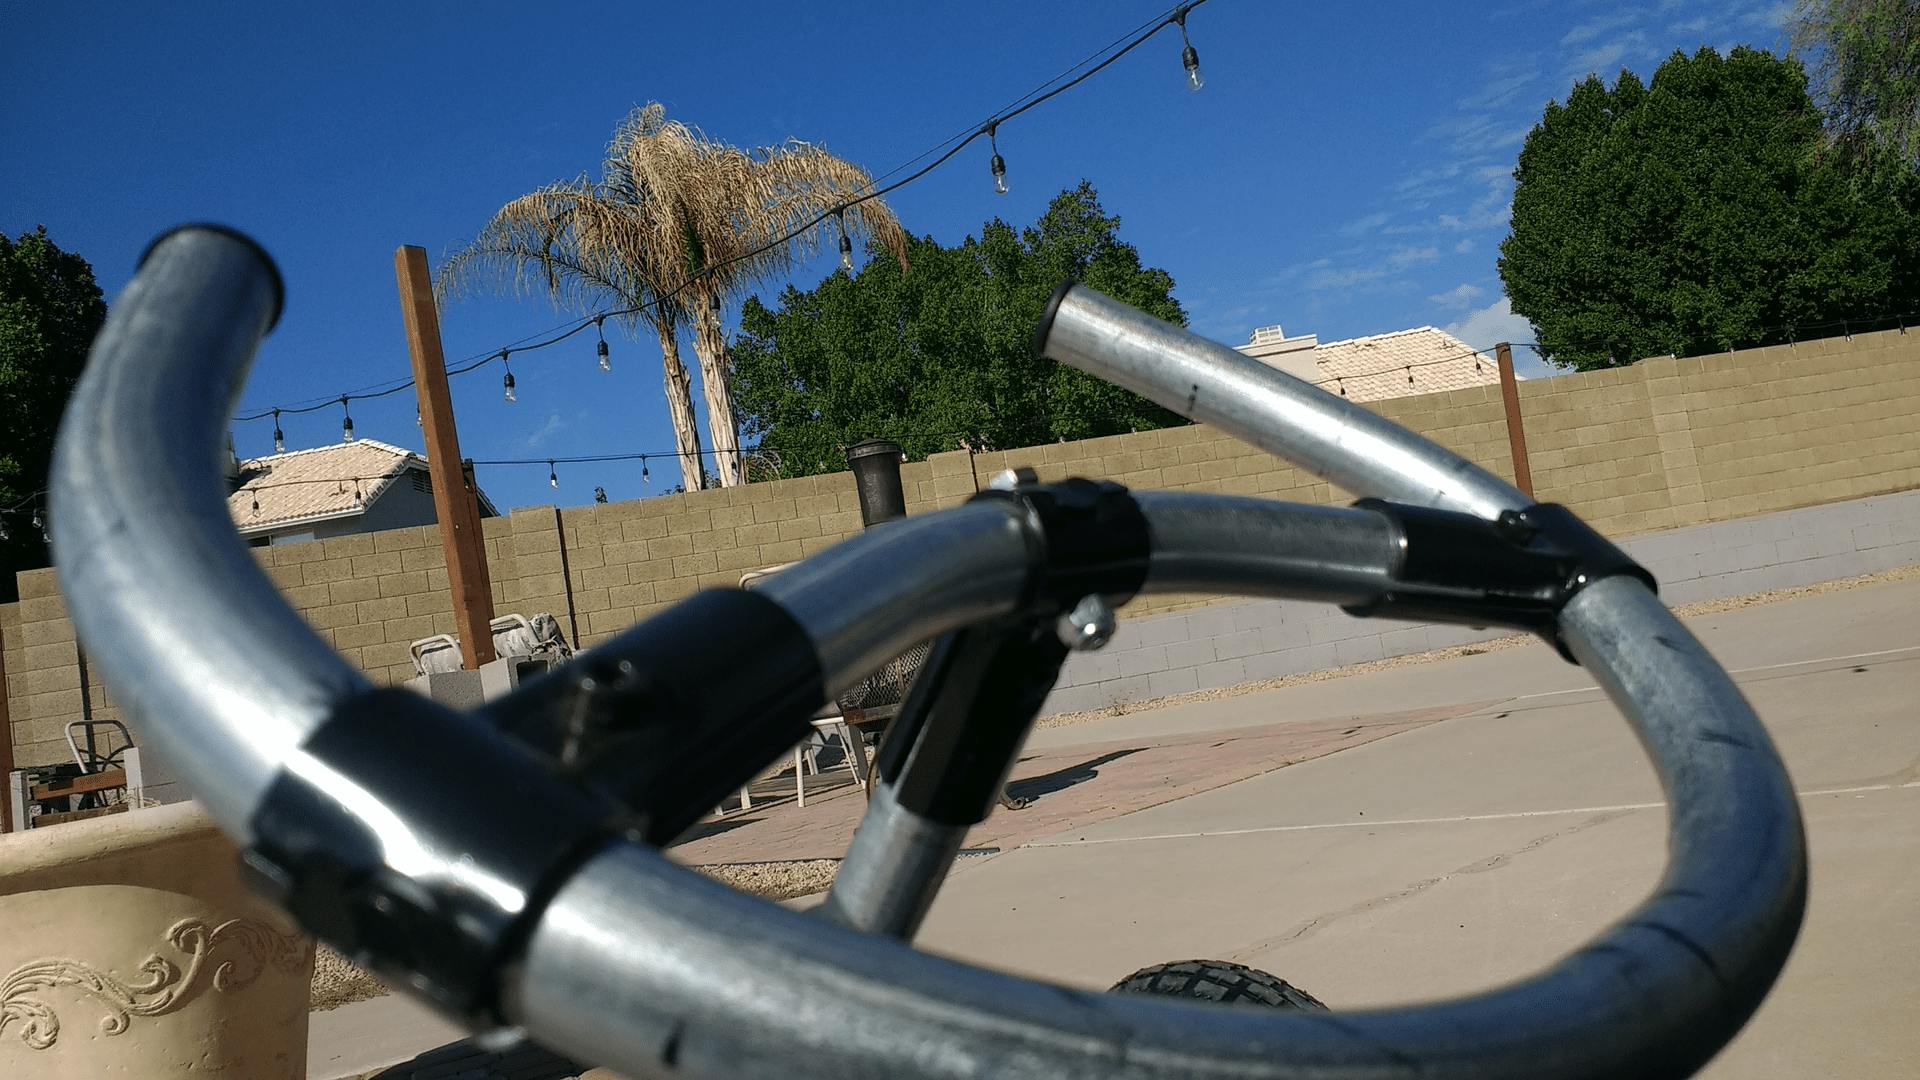
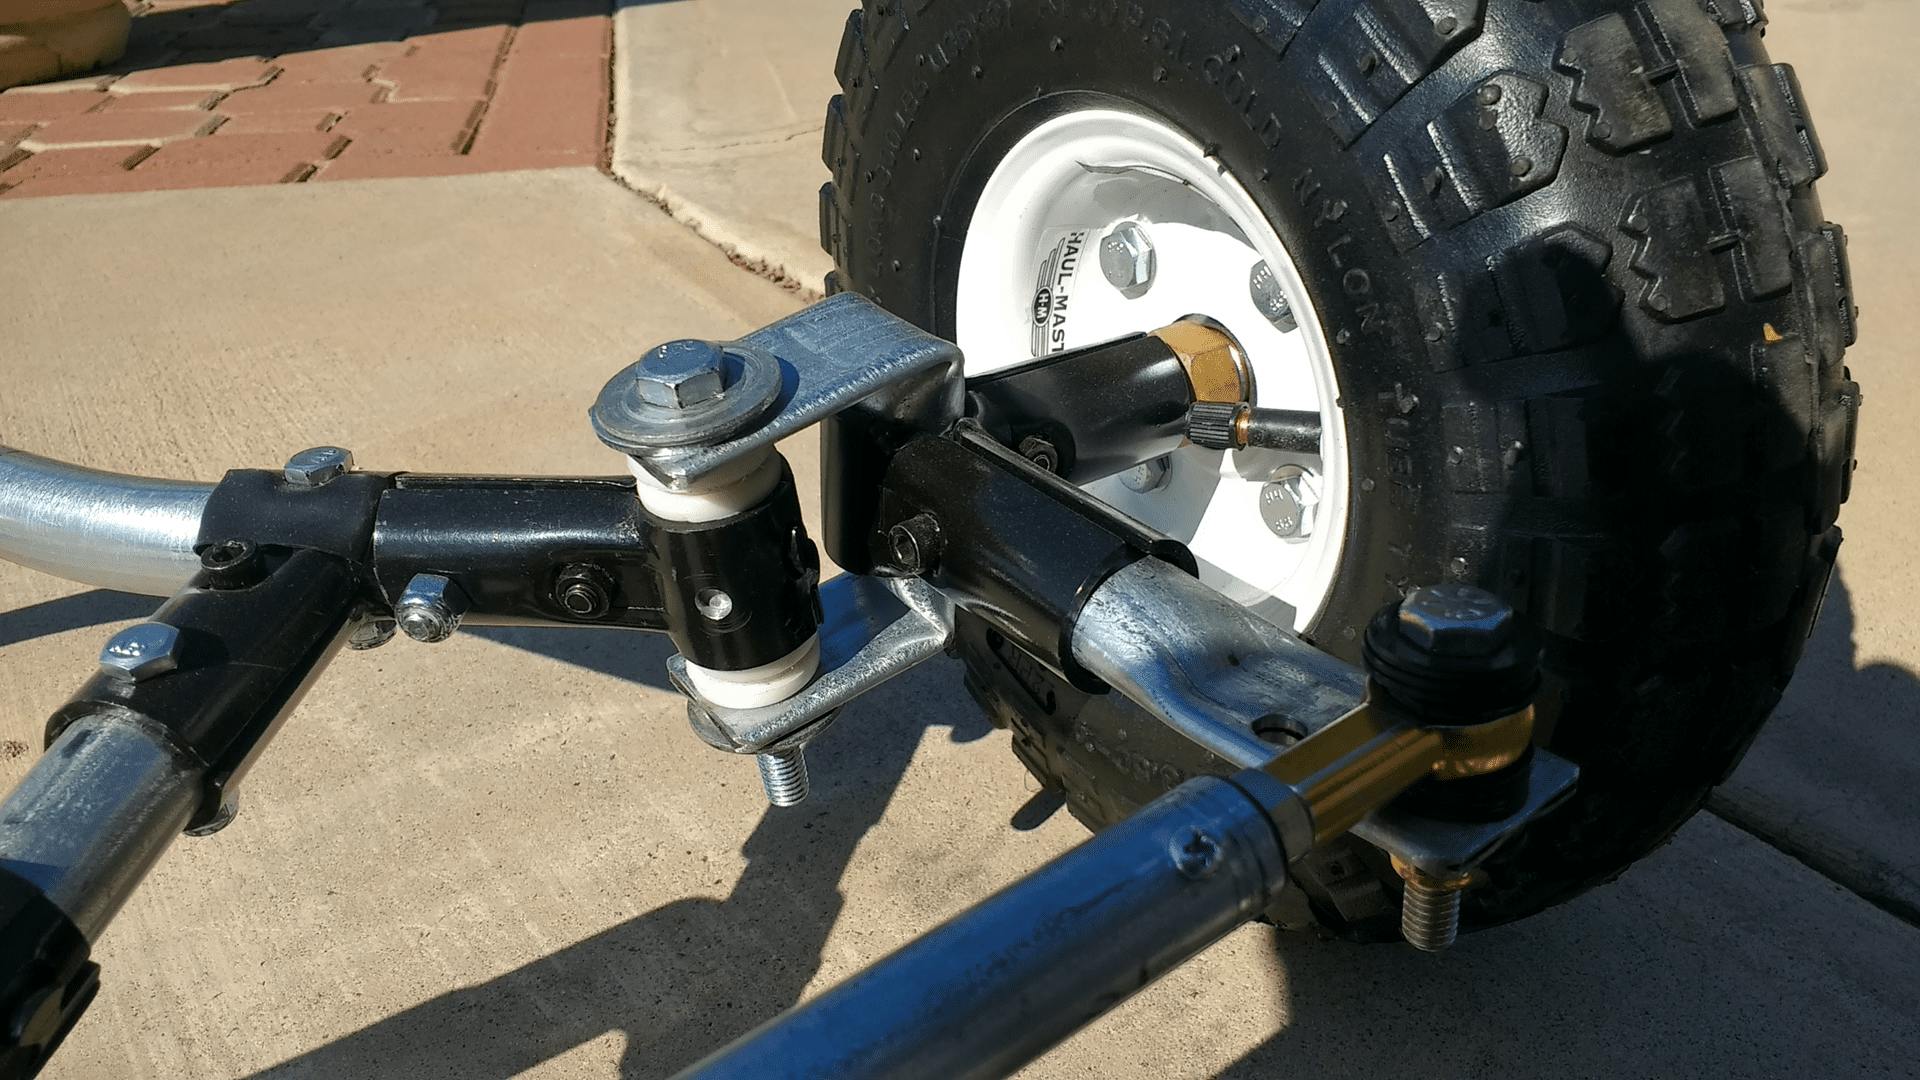
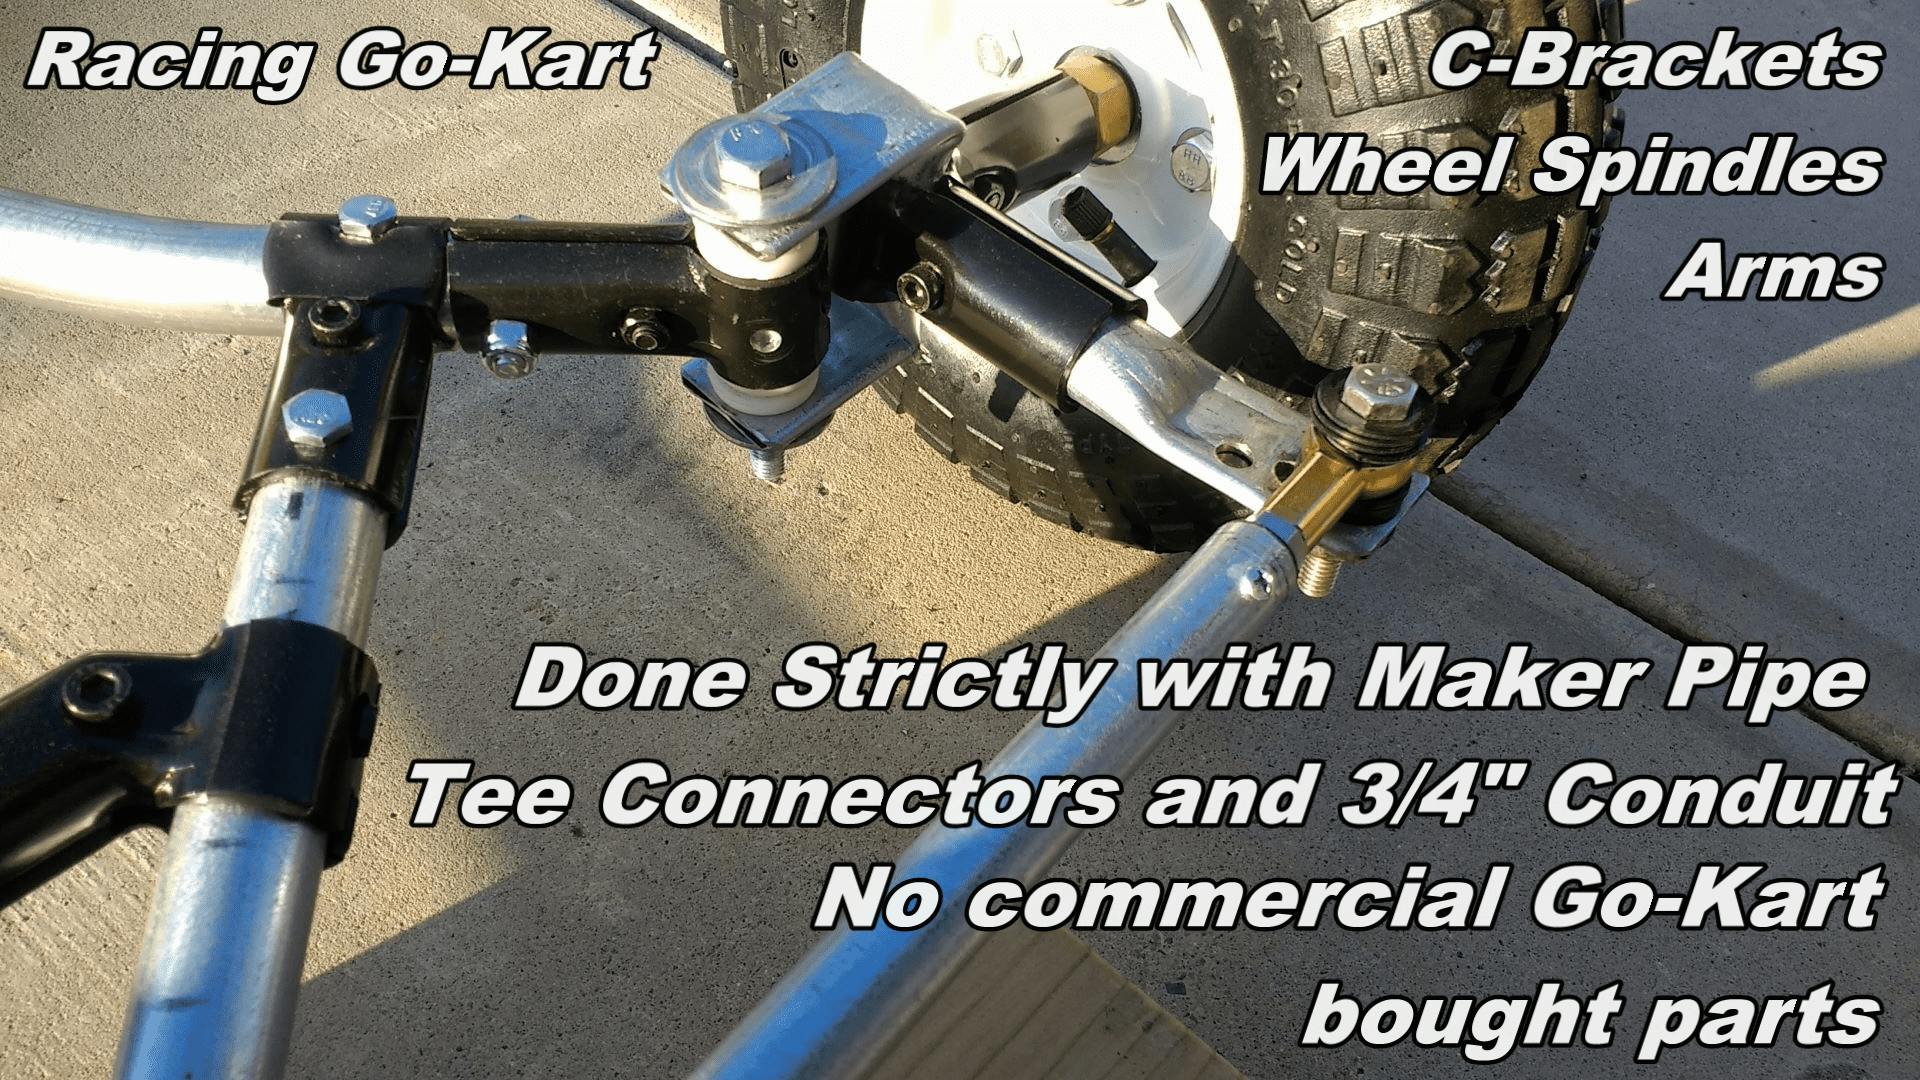
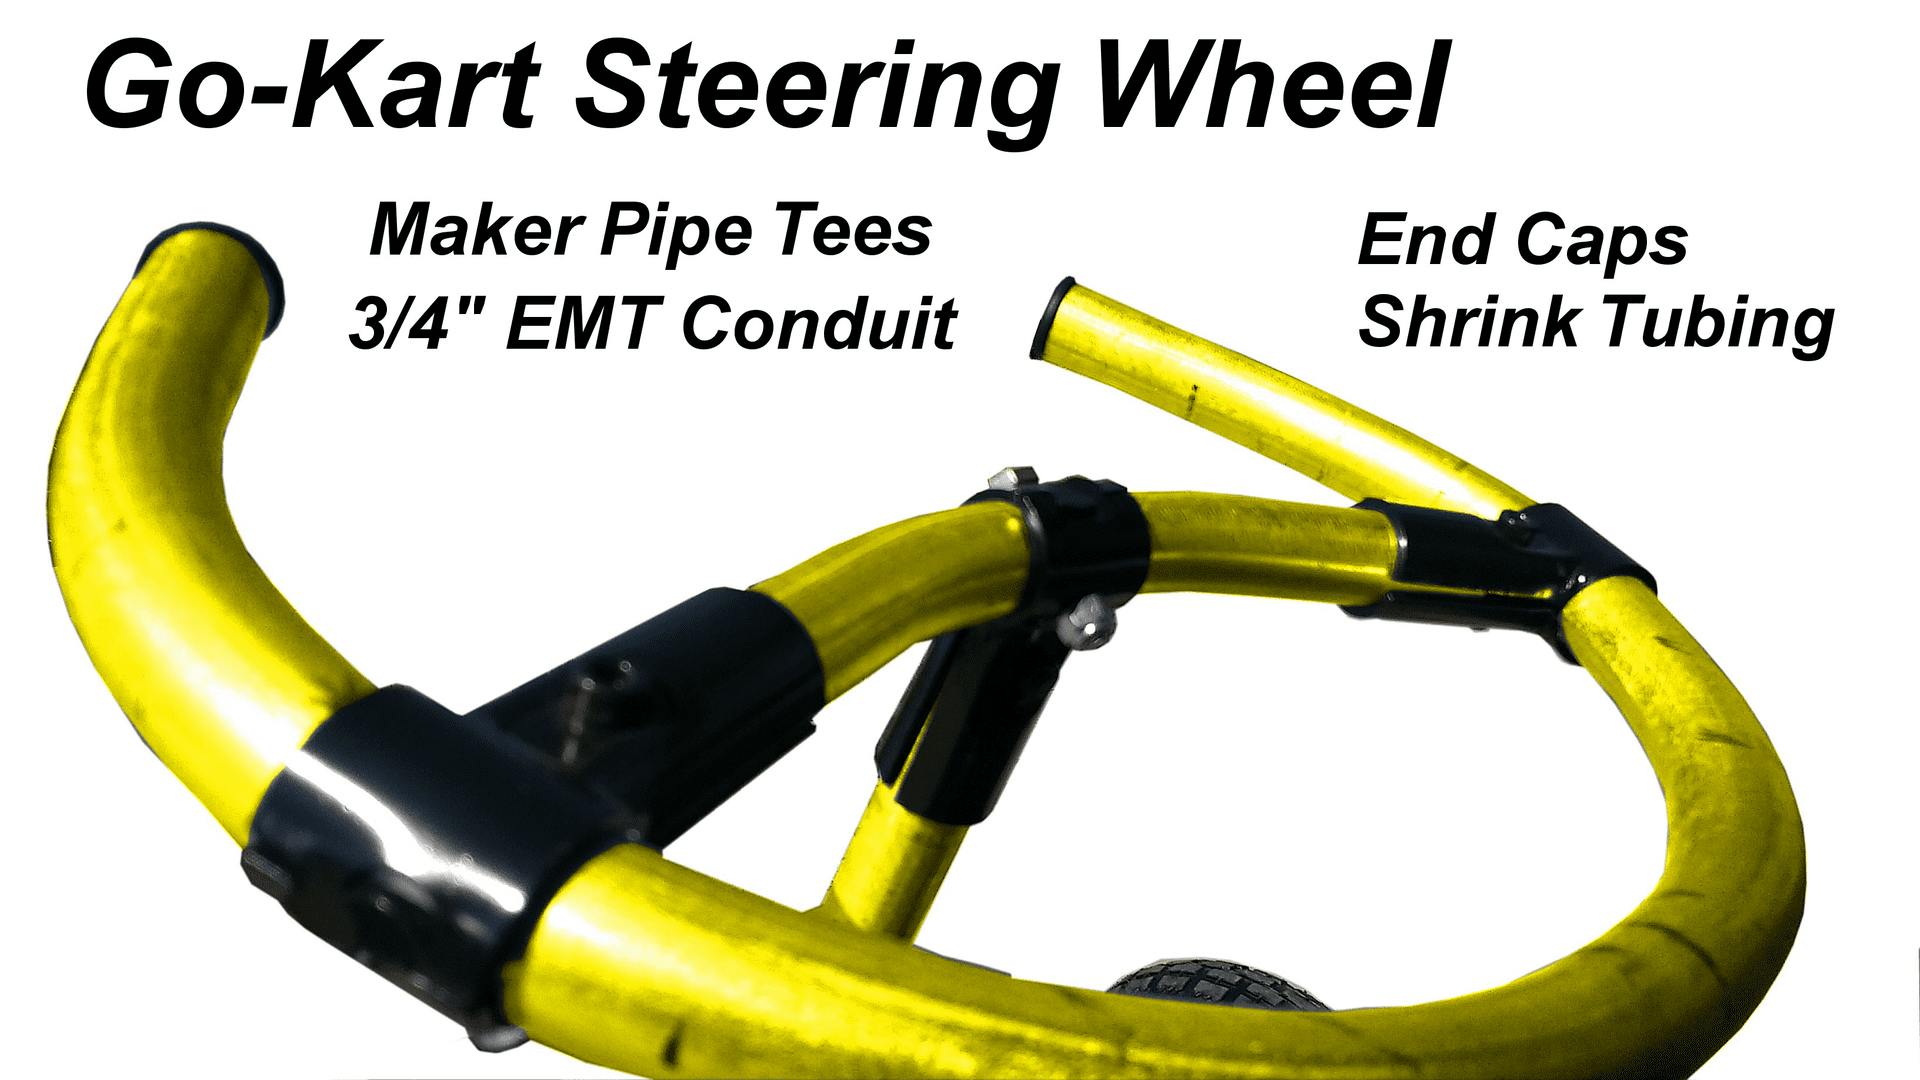
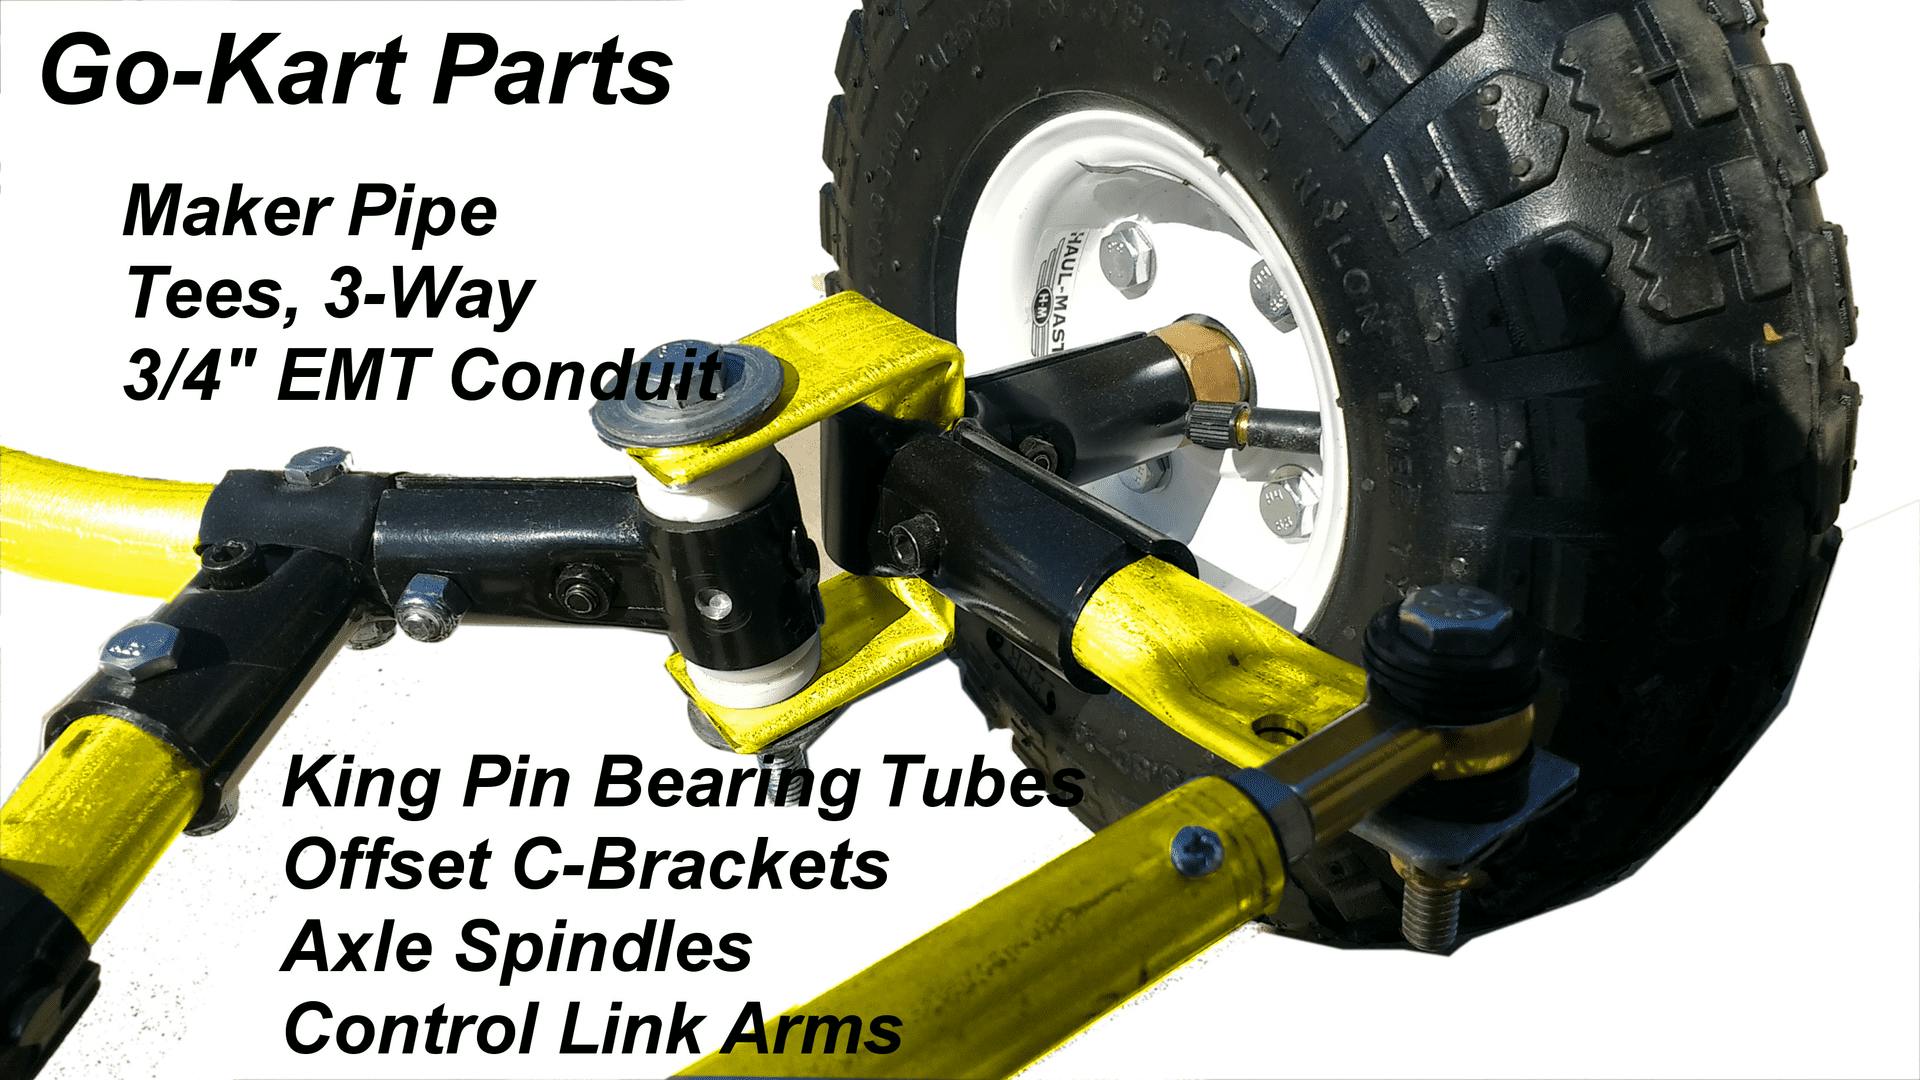
Spindles C- Brackets, Axles, Control Arms, Rear Motor Mounts and Steering Wheel, all made with EMT and MP Connectors. Zero commercial bought go-kart parts or welding.
Ok, I thought I share these photos of one of the projects that I have been working on and which required me to "press" the ends of the tubing, as I have shown in previous videos, for attaching them more securely and permanently to the Maker Pipe connectors.
While the frame architecture of most "racing go-karts" are similar and the use of the MP connectors are a logical option for making one quickly without welding, and a great deal of credit goes to Alex that built the first one from EMT and MP connectors, mine has some noticeable differences in the mechanical details that make up the front wheel dynamic control assemblies and rear wheel drive, if you look at them closely, which btw, their respective parts are typically done welded on the more commercial racing go-karts.
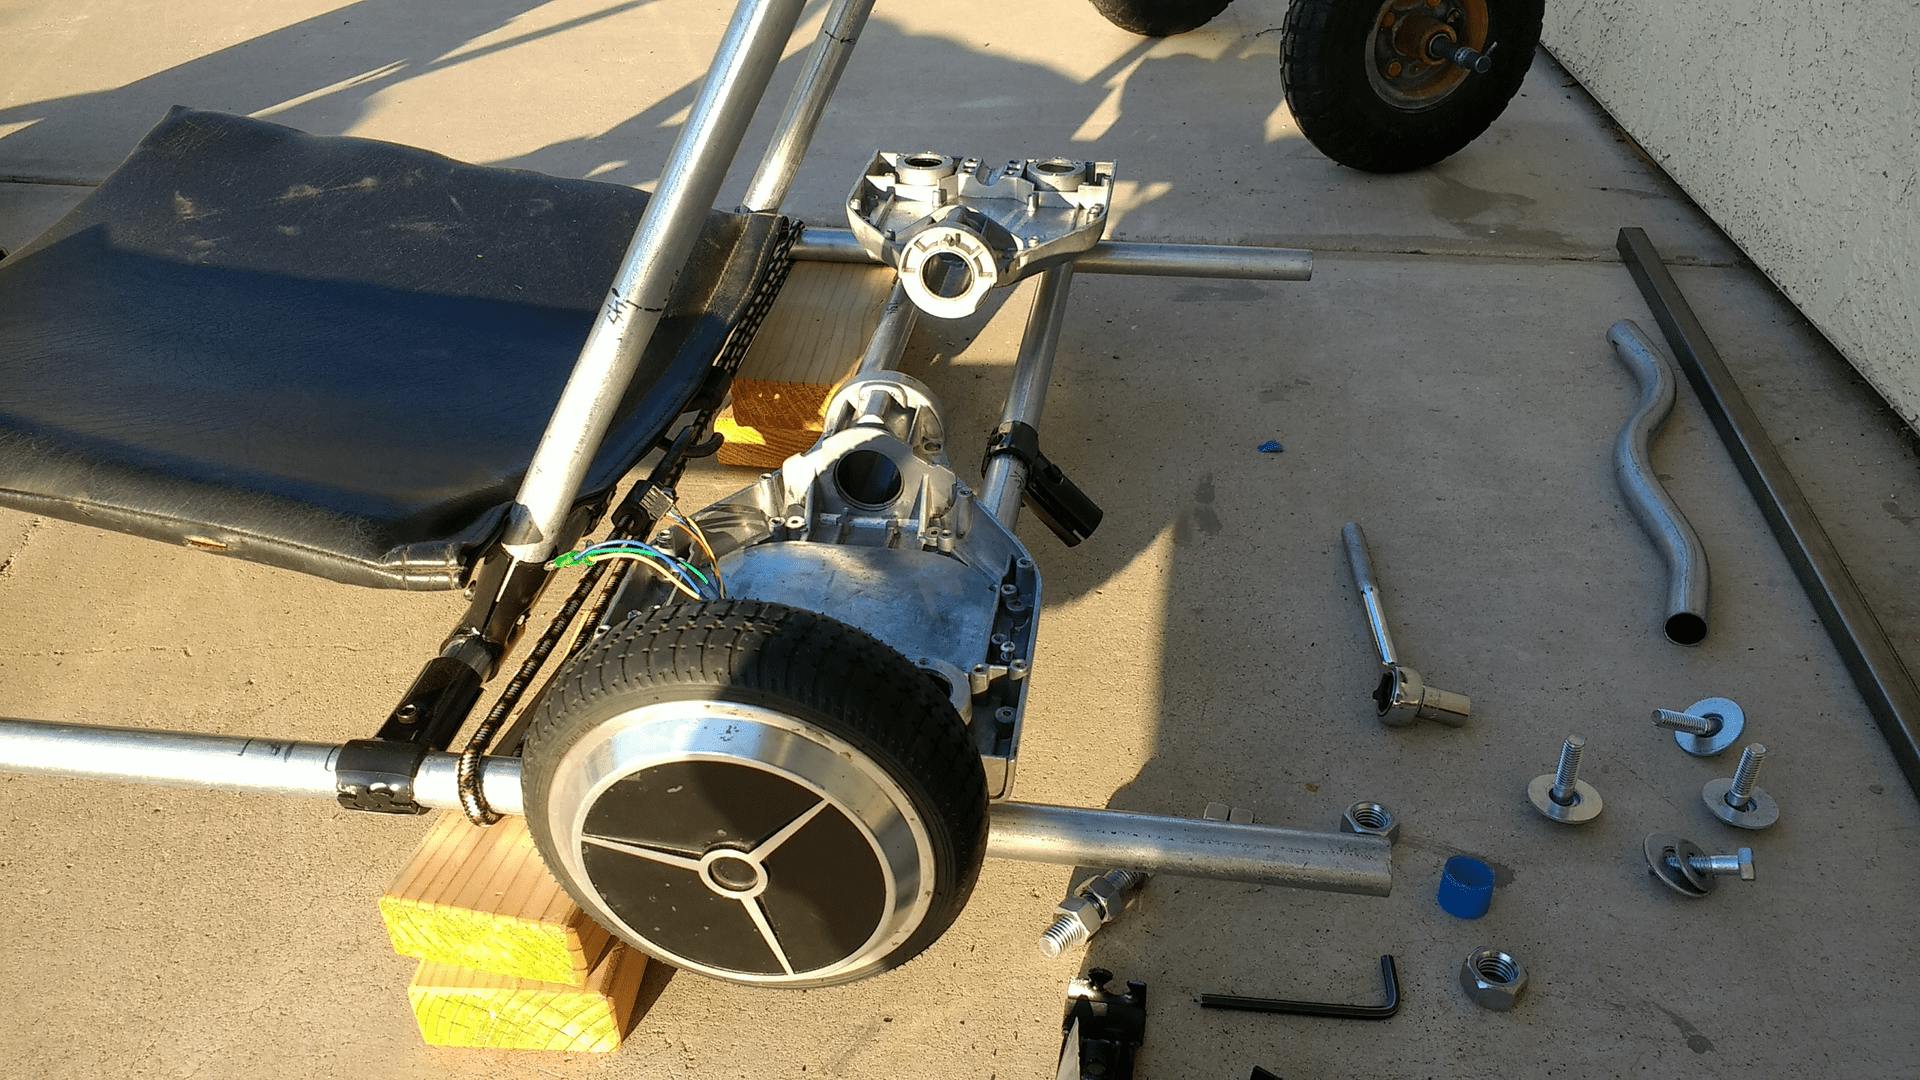
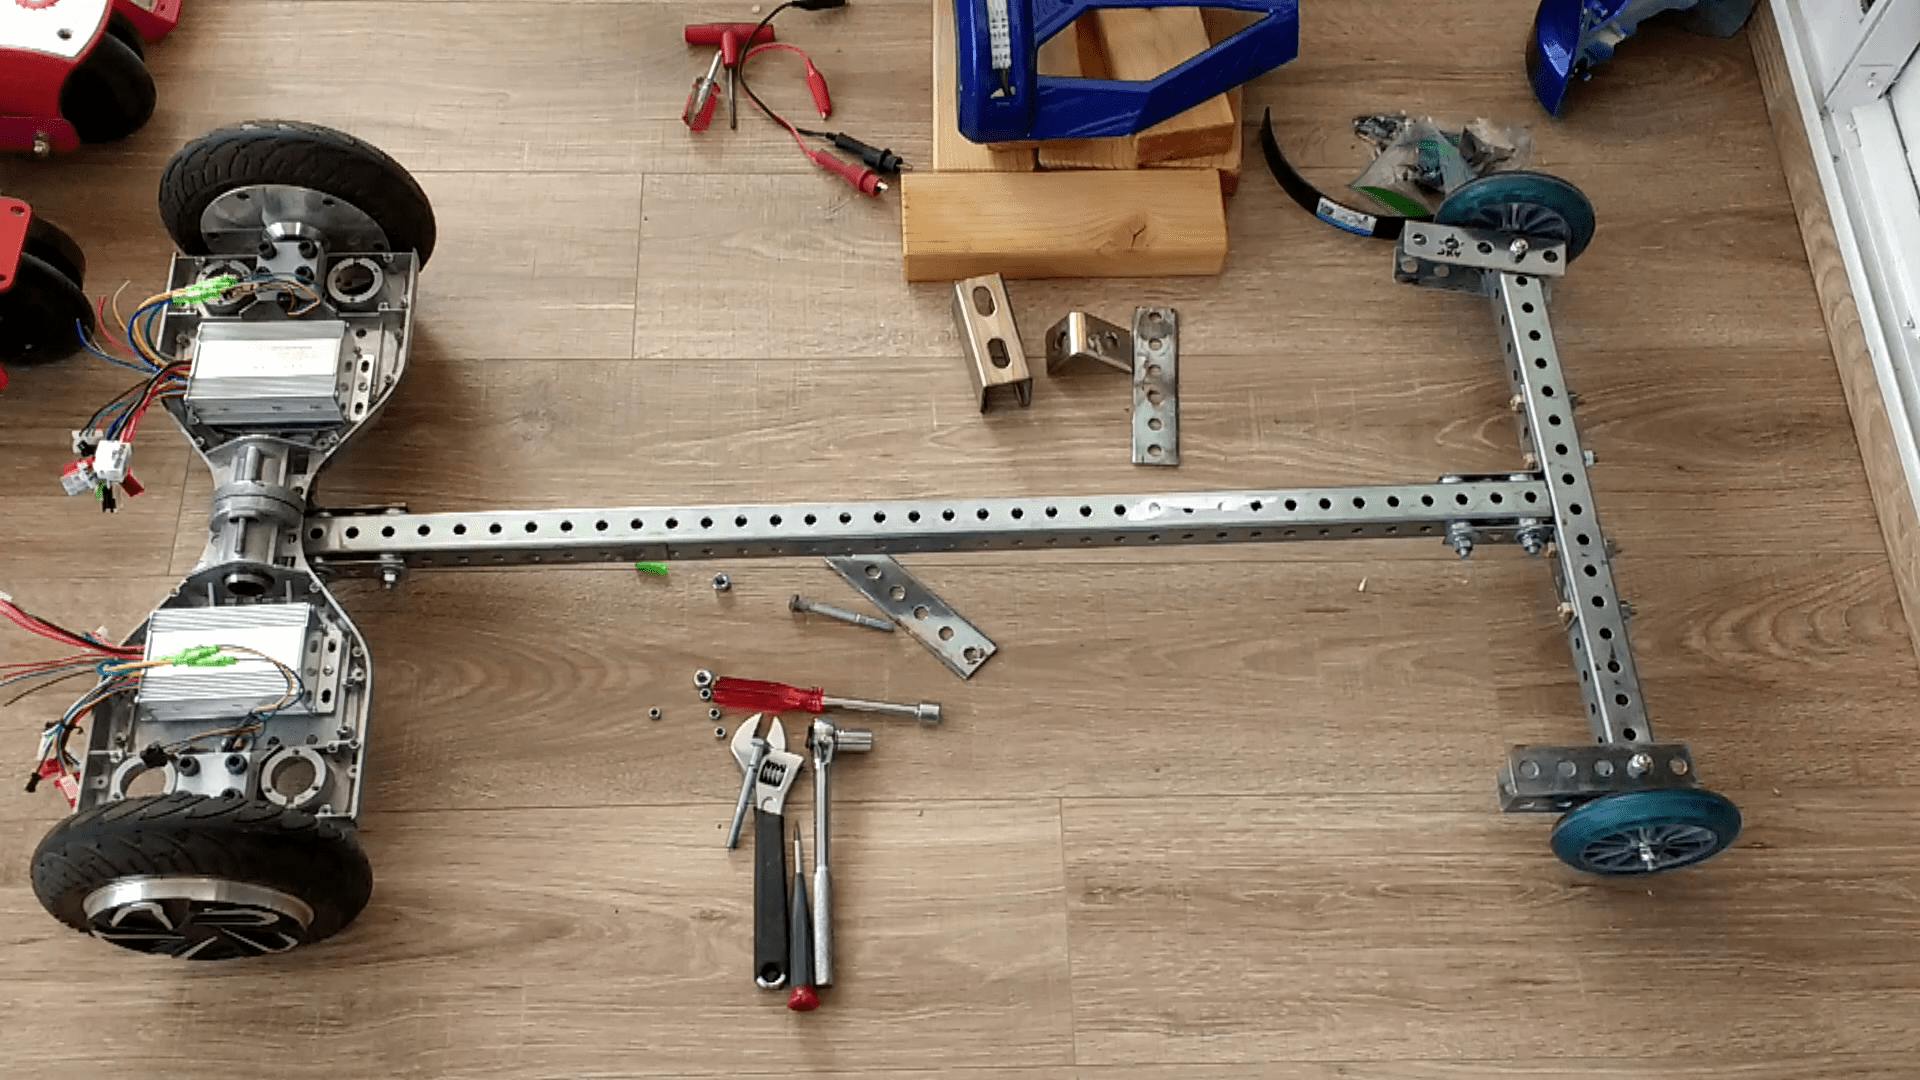
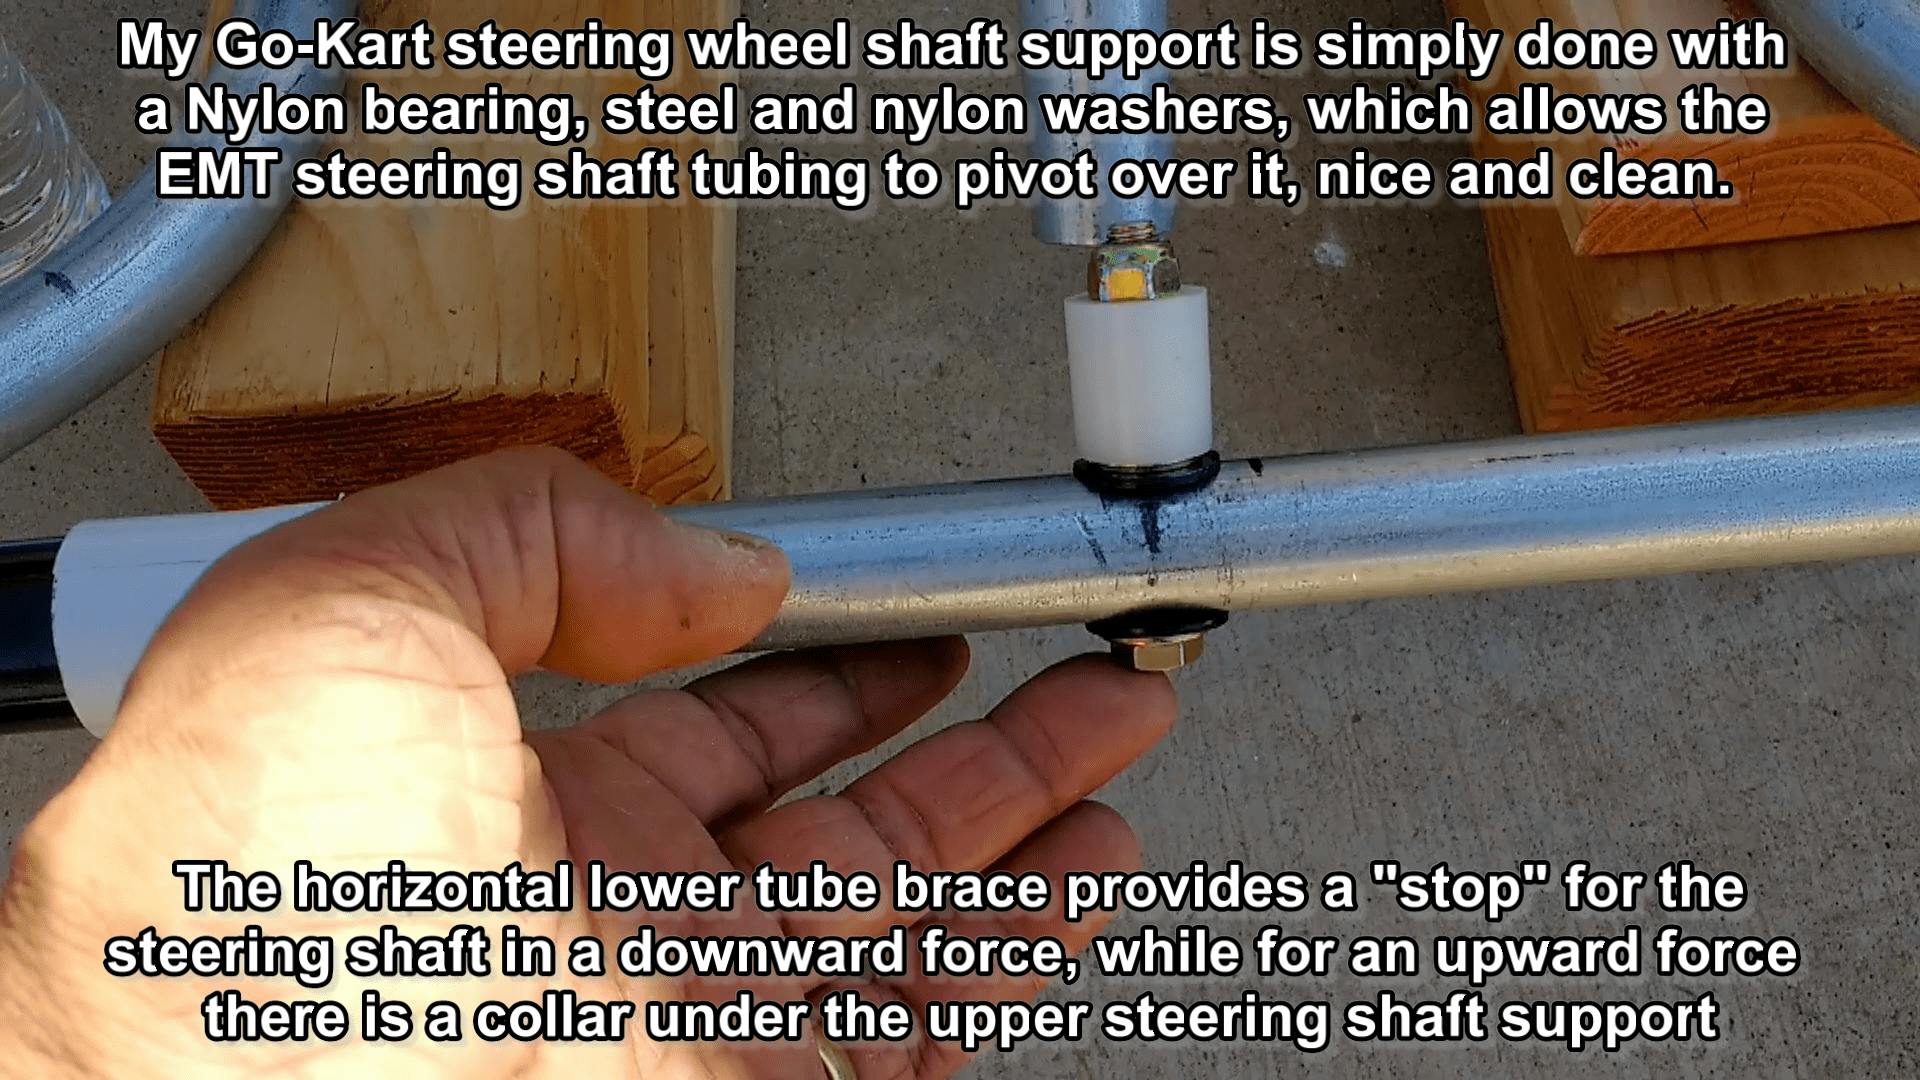
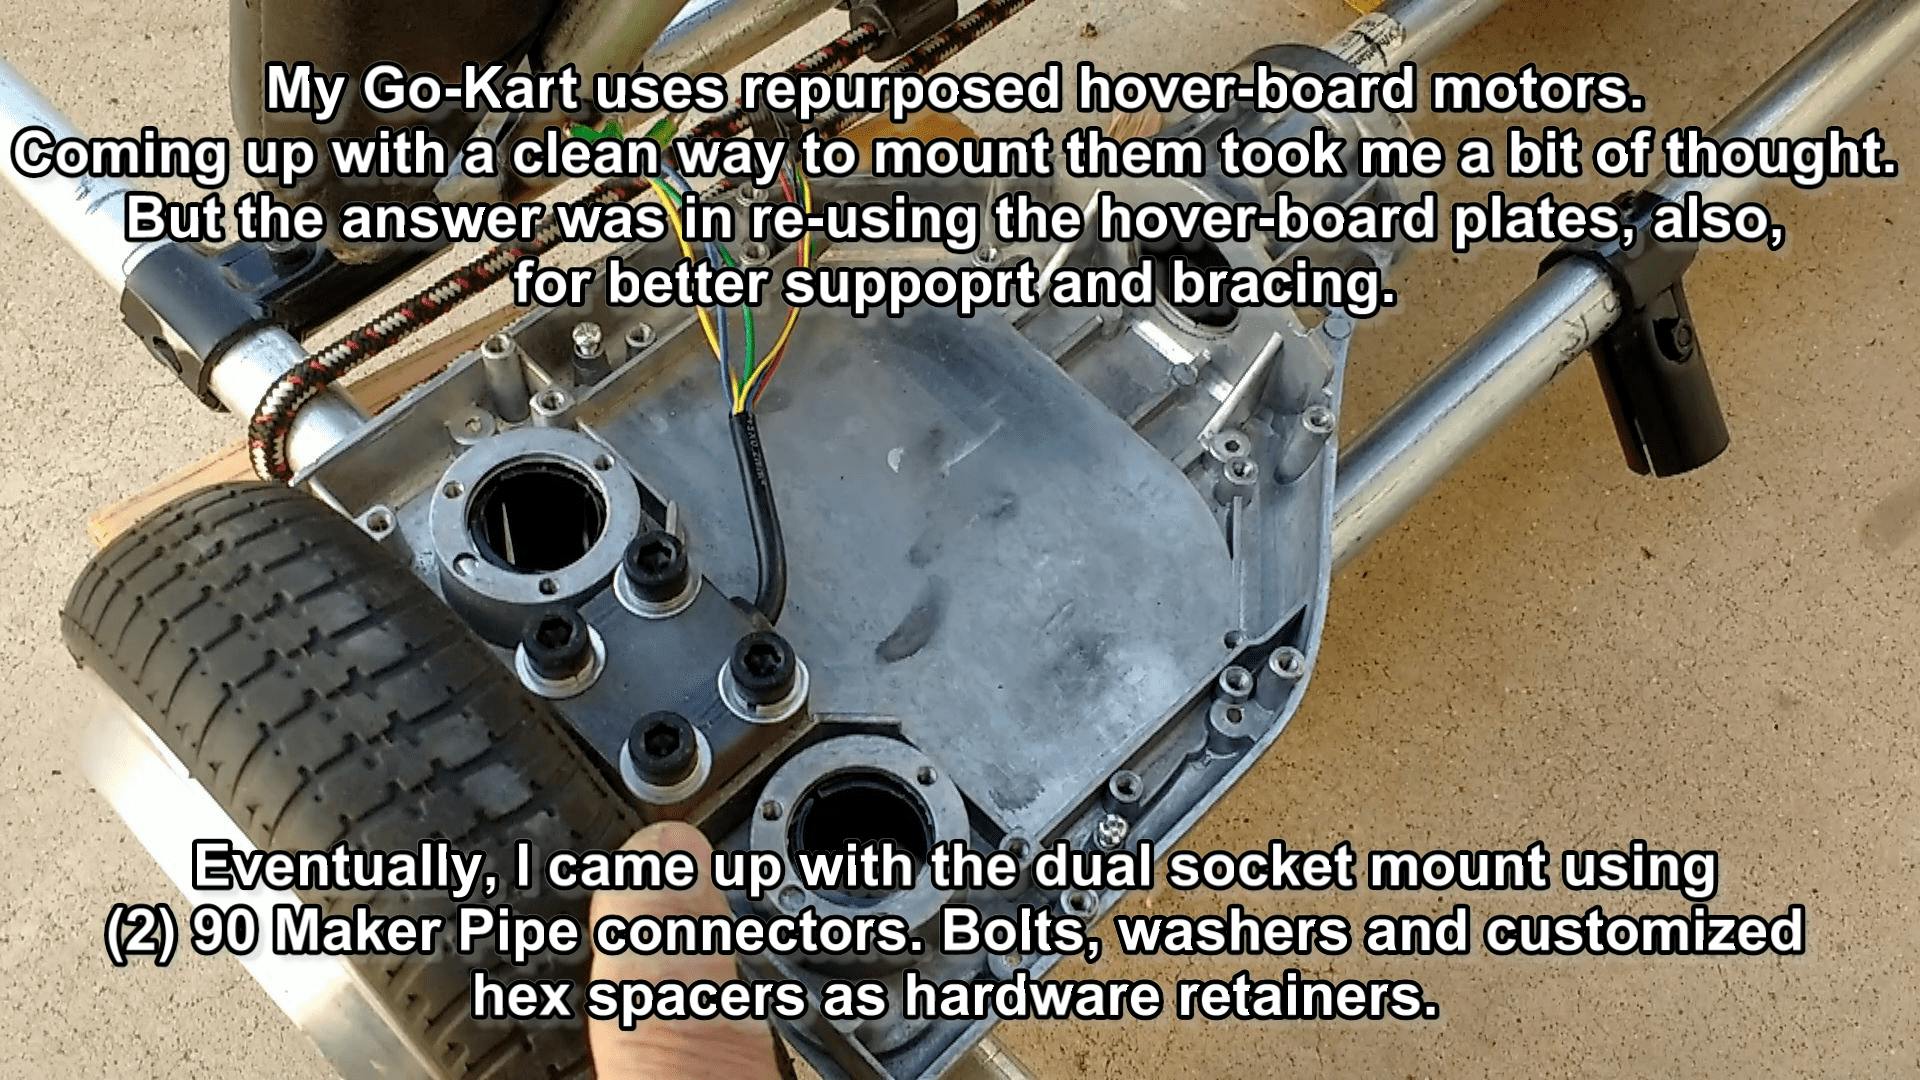
My steering wheel, steering spindles, c-brackets and control arm parts, including the rear mount for repurposed hover-board motors are strictly built from EMT and MP connectors, with the ends of the EMT tubes modified as I have shown in my previous introductory videos for a solid positive lock via the single stock MP connector bolt and nut. Although at some instances I have had to drill through them, something I did not want to do, in order not to disturb the nice surface area on the MP connectors.
I have long wanted to make my own adult-size no weld go-kart from EMT tubing and some other more involved fun projects using today's technology. I actually built similar projects back in the 80's for my kids when they were young, using the more expensive and less strong true electrical conduit connectors, so this project has long being brewing.
Upon finding Maker Piper option for the more expensive electrical connectors, and seeing the Go-kart from Alex, at this site, it really inspired me into making my own with some new and own twists.
The frame assembly on mine is similar to the commercial go-karts and the use of the connectors at specific key point is from a logical thought process that I think Alex was also working from when one contemplates builds of this nature.
While the main drive system on mine is also electric but of a different approach (zero commercial parts) and it has posed a huge challenge in making it work with the EMT and MP connectors from a mechanical support point of view, where I have really burned a lot of brain cells has been in the, scratch manufacturing, of the specific parts shown for the steering axles made from EMT to coincide with the MP connectors. I think Alex's car uses commercial spindles, much like the wheels, and drive system, but aside from the obvious parts such as wheels and tires, I did not want to purchase any commercial mechanical parts, at all, which seriously challenged me to come up with my own, king pin bearings, spindles, C brackets, axles and control arms.
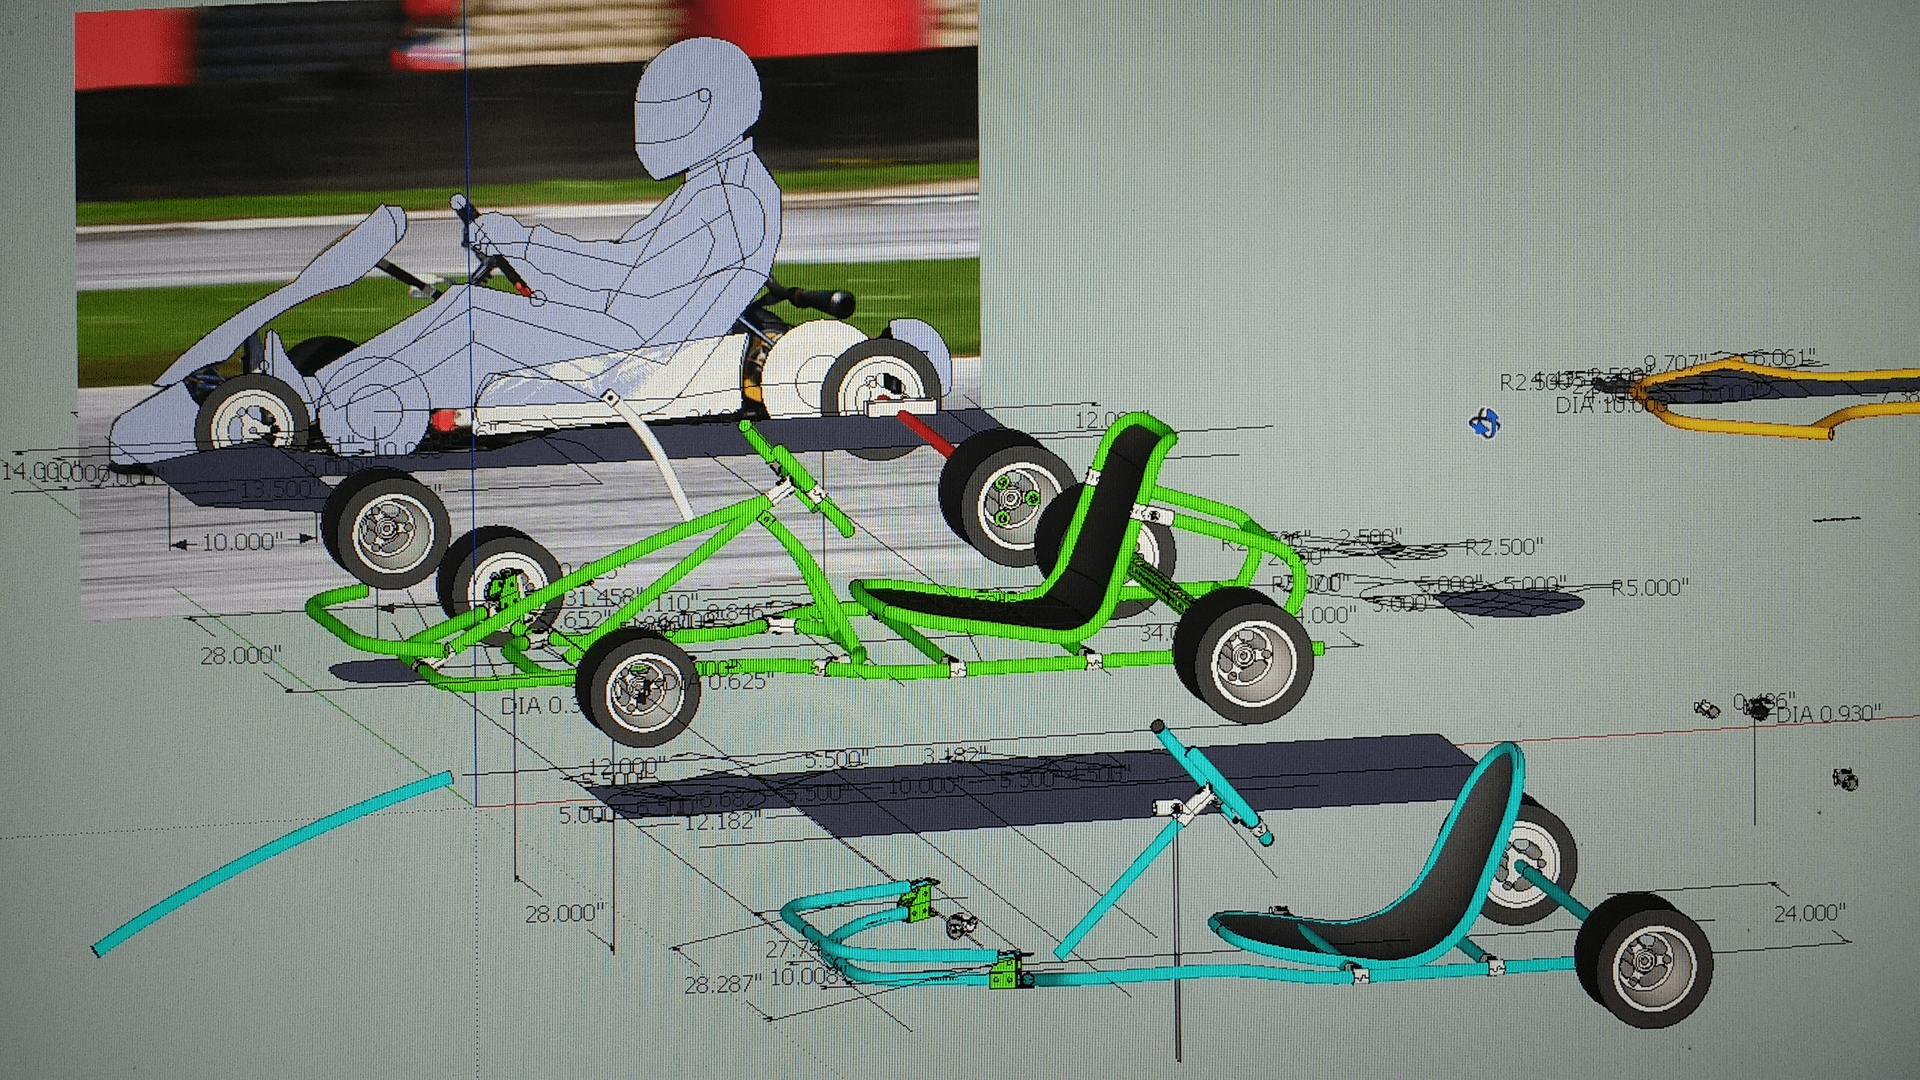
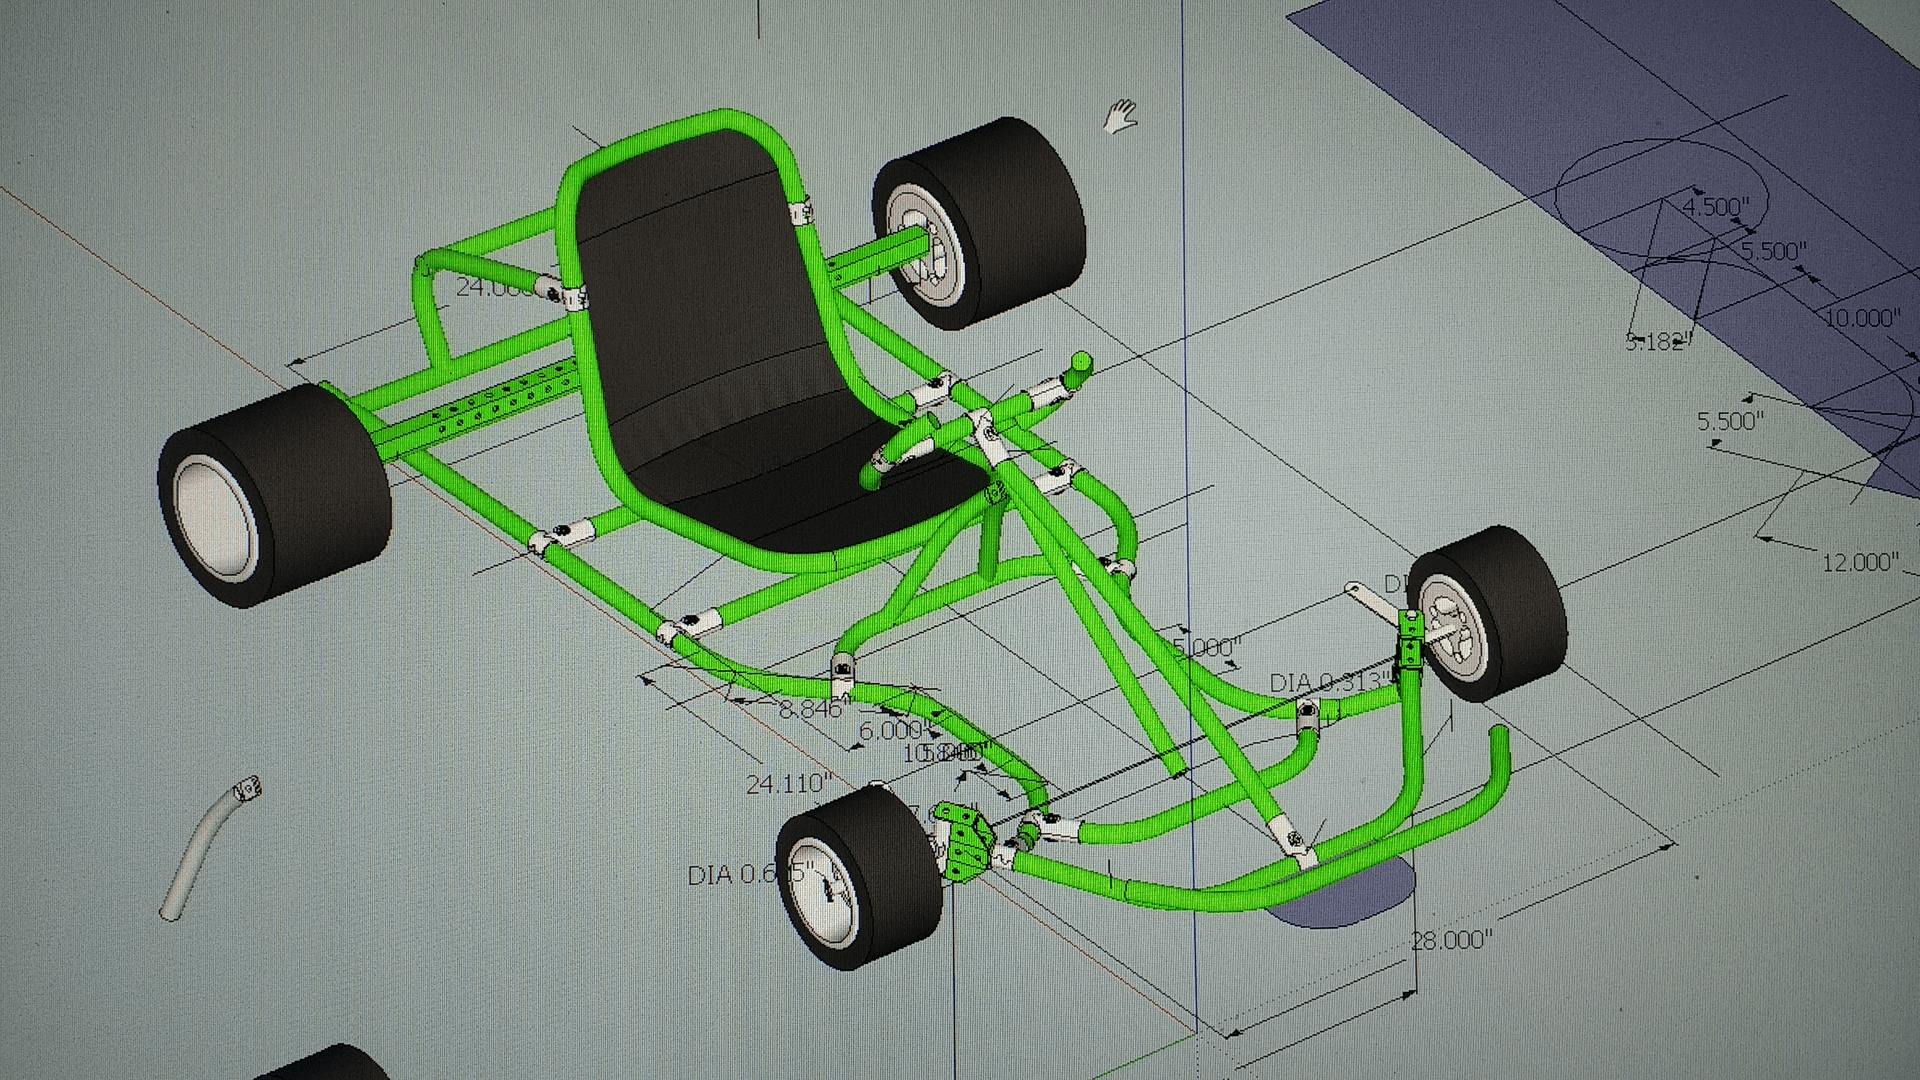
The seat and steering wheel is also my own contraption, having played with a few design ideas on paper and CAD that mimic the more commercial racing go-karts. I originally was contemplating doing the C brackets for the front steering from the same telescopic perforated steel tubing I used in my earlier Nano Go-Kart, (see my CAD drawing) but I actually found a way to use the EMT tubing and Maker Pipe connectors as shown, while maintaining the typical required "race go-kart performance angles" such as those found in king pin inclination, caster and camber settings, securely .
Once I had the all the jigs that I show in my previous videos, which allowed me to cut, bend and shape the EMT tubing quickly and precisely, and because the MP connectors allows for this type of logical build in some areas but with additional thought in others, this project started to take shape quickly. Many thanks to Maker Pipe for sending my connector orders in a timely fashion which also allowed me to make consistent progress in a short time.
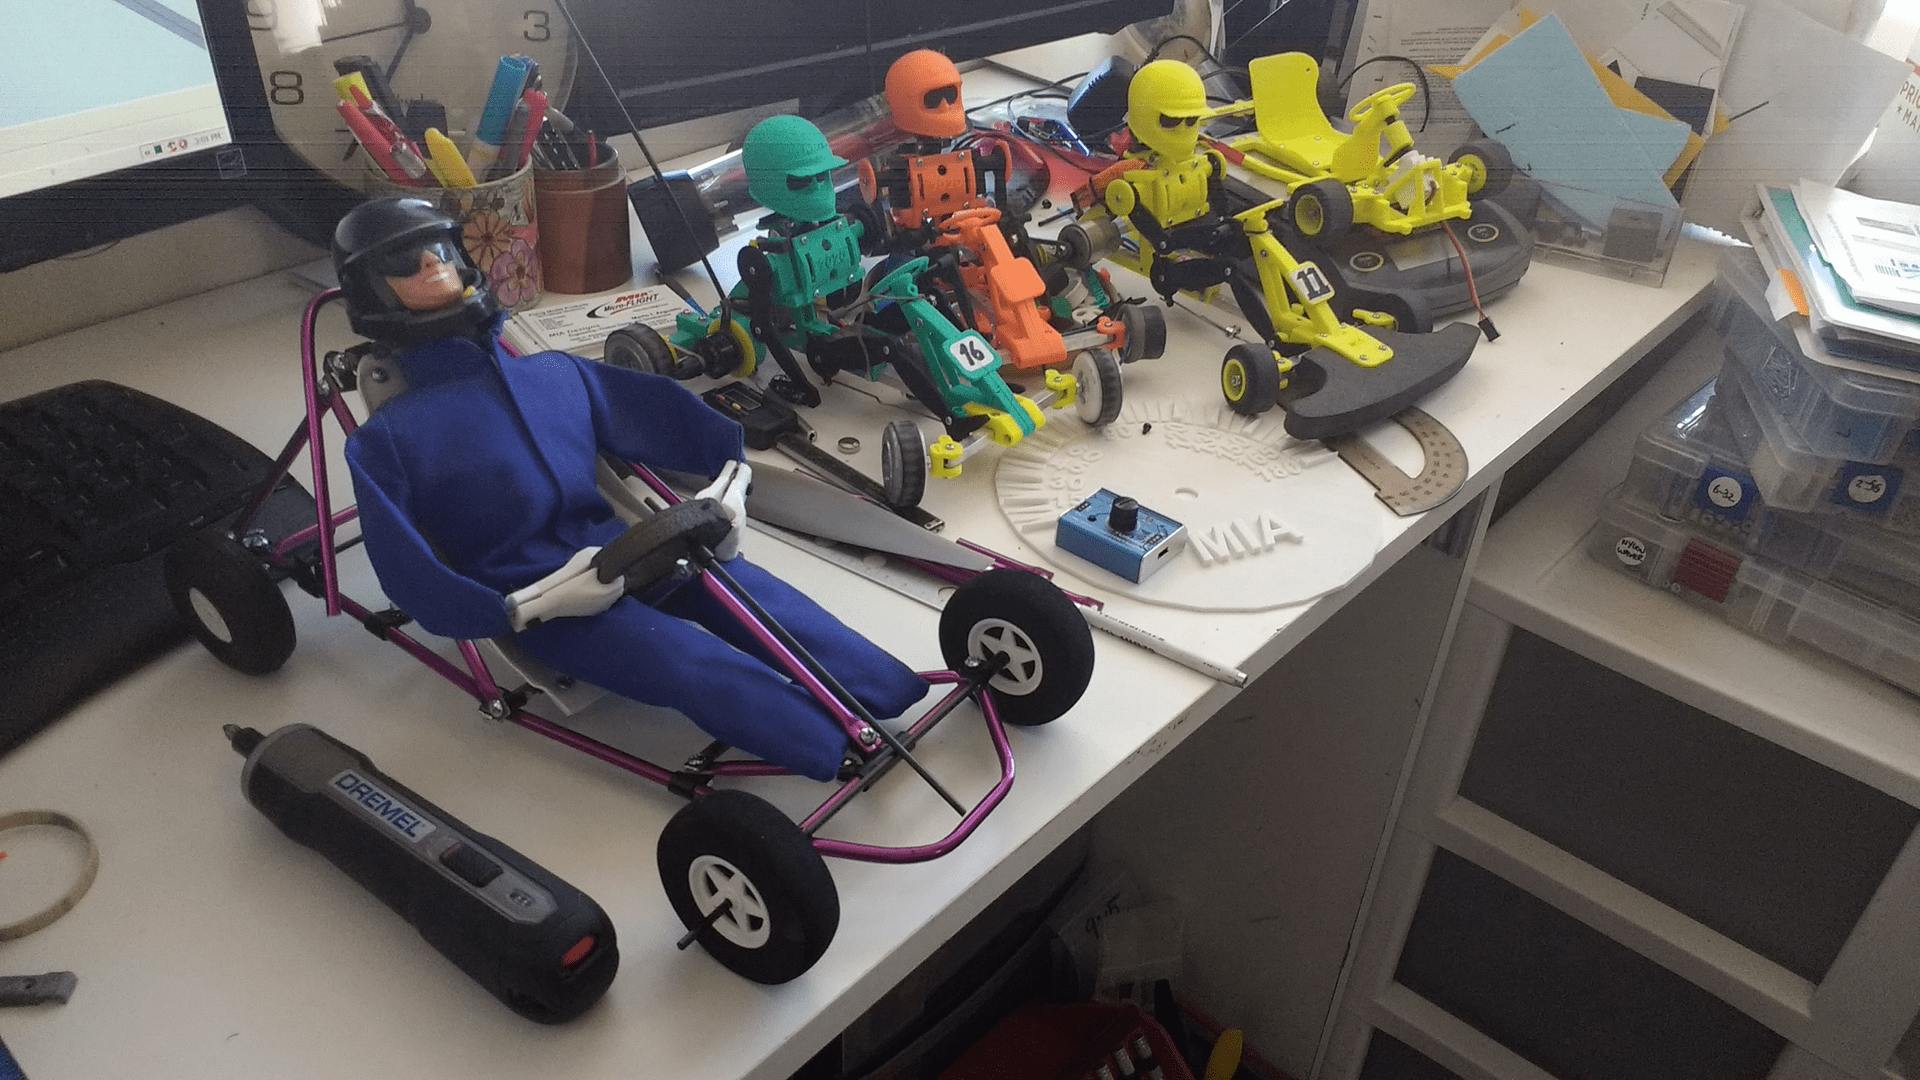
Racing go-kart design and architecture is not new to me, I have built various radio control ones, and as typical of my projects, I actually started this project by building a scale model of it to get a tangible idea how the full scale one would look like. My CAD drawings show my full scale "target Racing Go-Kart designs", which were also modeled by combining a lot of measurements taken from various race go-kart commercial designs and modified to make it work for my height, weight and comfort level. I am 5'11" and weight 186 lbs, and while the typical racing frame structure from EMT is not as rigid as the commercial go-karts, it allows a bit of flex, which I actually wanted as means of natural suspension, without having to resort to bought springs, shocks or added parts. Actually racing "on-road" go-karts do not have this type of suspension which is more prevalent in "off-road" karts, but since this project is for fun, simplicity was also my target goal.
My more serious secret project, is taking a bit longer because I have to establish a good level of safety in it, and every mechanical part has to be checked and tested over and over again. This is also why I did the EMT tube end press Jig with my own 3D printed dies so that I could also speed up that project.
I added a few more photos, I ordered the yellow heat shrink tubing because yellow and black have long been my color choice for my main products and DIY projects, in this color combination, so I edited a couple photos to show this color scheme which I am eager to use on the rest of the go-kart.
More on my projects to come...
